Bake Black Velvet Cake - A Delicious Indulgence
Crave something heavenly? Bake Black Velvet Cake - Indulge in Decadence! This rich dessert holds a special place in my heart – try my secrets and enjoy the fluffy texture!

- Get Ready to Indulge: The Magic of Black Velvet Cake
- What’s All the Fuss About? A Recipe Overview
- Why This Cake is a Must-Bake: Key Benefits
- Tips for the Perfect Bake
- Essential Ingredients Guide for Baking Heaven
- Mastering the Art of Professional Cooking
- look into into the Decadence: Bake Black Velvet Cake - Indulge in Decadence
- Recipe Card
Get Ready to Indulge: The Magic of Black Velvet Cake
Oh my gosh, let me tell you a little story about the first time i ever baked a black velvet cake .
I was trying to impress my friends for a birthday party, and boy, did i underestimate the power of this cake! it's rich, it's dark, and it’s a total crowd-pleaser – the kind that makes people go, “you made this?!”.
If you’ve ever wanted to bake black velvet cake - indulge in decadence , you’re in for a treat! trust me, this isn't just any cake; it’s a slice of pure bliss.
What’s All the Fuss About? A Recipe Overview
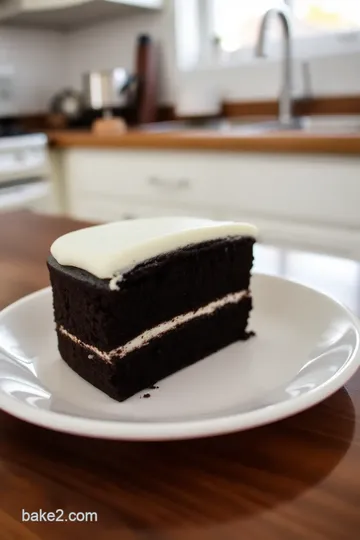
The black velvet cake is like the sultry cousin of red velvet. originating in the early 20th century, this luxurious dessert shows off a unique blend of deep cocoa flavor and a moist texture that’s to die for.
When you take a bite, you'll immediately understand why it's such a hit at parties and celebrations.
You might be wondering about making it yourself. the good news? this cake is rated medium in difficulty. no advanced baking skills required here! just a little patience.
With about 20 minutes of prep time and 30 minutes of baking , plus some chilling time, you can whip this beauty up in just about an hour and twenty minutes.
And it serves 8 generous slices , which is perfect for sharing… or not!
Talking about cost, you won’t break the bank either! you probably have most of the ingredients lying around anyway, making it a fantastic choice for when you want to serve something special without going full-on gourmet.
Why This Cake is a Must-Bake: Key Benefits
Now, let me tell you why this cake is simply unforgettable. health benefits? you bet! well, sort of. chocolate has antioxidants, right? plus, the buttermilk gives it some nice tanginess, so you can almost feel virtuous while you indulge.
Well, maybe indulge isn’t the best word–how about, enjoy deeply decadent flavors?
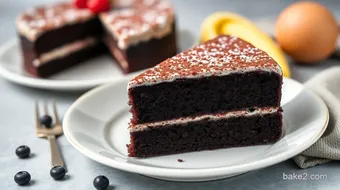
This cake shines during special occasions . birthdays, anniversaries, or just because it’s tuesday – it fits every scenario. it’s not just about looking good; it’s a showstopper in flavor too! with its rich, fluffy texture, it beats any ordinary cake hands down.
And let’s not forget the cream cheese frosting . it’s creamy, dreamy, and just totally elevates this cake. you could even turn it into a luxurious dessert by adding some chocolate shavings or fresh berries on top! seriously, those cake decorating ideas can be endless.
Tips for the Perfect Bake
Before i wrap this up, here are a couple of baking tips to get you started. first off, always bring your eggs and buttermilk to room temperature before mixing.
This helps to achieve that fluffy cake texture that you want. and hey, don’t overmix the batter! gently folding those ingredients keeps your cake light and airy, rather than dense and sad.
And remember, chilling your cake after frosting makes a real difference. it allows that delicious cream cheese frosting to firm up just enough to make slicing easier.
No one wants a frosting disaster on their plate and, trust me, it’s worth the wait!
So, are you ready to roll up your sleeves and gather those ingredients? because it’s about to get exciting! let’s dive into what you’ll need to make this black velvet cake that’s sure to wow everyone at the table.

Essential Ingredients Guide for Baking Heaven
Alright, let's dive into the kitchen essentials for whipping up a black velvet cake that’ll have everyone saying, “oh my gosh, this is amazing!” whether you’re a newbie or a seasoned pro, knowing your ingredients is key.
So grab a snack, get comfy, and let’s get into it!
Premium Core Components
To make your Black Velvet Cake , you need to gather some premium core ingredients . Here’s the scoop:
-
Detailed measurements: you’ll need 2 cups (250g) of all-purpose flour, 1 and 1/2 cups (300g) granulated sugar, and 3/4 cup (75g) unsweetened cocoa powder.
If you’ve got a kitchen scale, it helps take the guesswork out!
-
Quality Indicators: Look for high-quality cocoa powder . If it smells divine, you’re golden! For flour, check the packaging for a fine texture.
-
Storage guidelines: keep your flour and sugar in a cool, dry place. properly stored, they’ll last for several months. cocoa powder, though? it can last way longer.
Just don’t let it get funky!
-
Freshness Tips: For fresher baking, try to buy ingredients in smaller quantities. Avoid old opened bags sitting in the back of your pantry — trust me, nobody wants stale cake.
Signature Seasoning Blend
Now, let’s jazz up that cake with the signature seasoning blend !
-
Essential Spice Combinations: For this beauty, it’s all about the cocoa. A pinch of salt will lift the flavors beautifully!
-
Herb Selections: While this cake leans towards chocolatey goodness, feel free to mix in a hint of espresso powder for that lovely depth.
-
Flavor Enhancers: The kicker is the vanilla extract . A quality vanilla adds that umami magic. And let’s not forget the optional black food coloring if you want it to scream velvet!
Smart Substitutions
Sometimes life throws a curveball, and you need to improvise. Here’s where smart substitutions come in handy:
-
Common Alternatives: Don’t have buttermilk? Mix 1 cup of milk with 1 tablespoon of vinegar and let it sit. Voila, buttermilk!
-
Emergency replacements: out of eggs? no problem! use flax seeds or applesauce . each egg can be replaced with 1/4 cup of applesauce or 1 tablespoon of flax mixed with 2.
5 tablespoons of water.
-
Seasonal Options: If berries are fresh and in season, toss some on top for decoration. They’ll bring a burst of freshness to your decadent chocolate cake!
Kitchen Equipment Essentials
No recipe is complete without the right tools! Make sure you have these kitchen equipment essentials :
-
Must-Have Tools: You’ll need those two 9-inch round cake pans , mixing bowls, and an electric mixer. Investing in a spatula makes frosting a breeze.
-
Alternative Equipment Options: Don’t have a mixer? No stress! A whisk works too — just get that arm ready!
-
Preparation Tips: Greasing the pans with butter and a light dusting of cocoa powder ensures your cake doesn’t stick. Trust me, nobody wants to deal with a broken cake.
Final Thoughts
Now that you’ve got the lowdown on essential ingredients and tools, you’re all set to Bake Black Velvet Cake - Indulge in Decadence! The next step is crafting your delicious dessert ideas , so get those ingredients ready and let’s get to the instructions part of this culinary adventure!
Honestly, it’s gonna be a blast to whip up this decadent chocolate cake — perfect for those special occasions or just a cozy friday night.
Trust me, once you slice into that fluffy cake texture and see the rich, dark frosting, you'll be forever addicted! let's get baking!
Mastering the Art of Professional Cooking
Cooking can feel like a dance, a little chaotic yet incredibly rewarding when you nail those steps. To create that magical dish, like the way we Bake Black Velvet Cake - Indulge in Decadence , a few professional cooking methods can elevate your skills and make you feel like a culinary superstar!
Essential Preparation Steps
Let’s start with mise en place . oh, trust me, you’ll thank yourself later for having everything ready before you dive into cooking.
Chop, measure, and organize all your ingredients. this isn’t just for fancy chefs; it saves time and reduces mess.
Now, let’s talk time management. cooking isn’t just about throwing things together. set a timer for each task. got that prep? give yourself 20 minutes .
Baking? aim for 30 minutes . keeping a close eye on what needs when will keep you from burning your delicious creation!
Keeping it organized is key. use separate bowls for dry and wet ingredients. label your pans if you're making several dishes.
You don’t want a buttermilk mix-up! safety is another important step. always wash your hands before cooking and remember to keep sharp knives away from those eager kiddos.
Step-by-Step Process
Here’s the nitty-gritty of professional cooking. begin by pre-heating your oven to 350° f ( 175° c) . don’t skip this! oven heat matters! next, combine your dry ingredients.
A simple whisk does wonders.
Then comes the wet ingredients. make sure those eggs and buttermilk are at room temperature . why? they mix better! once you've combined both, it’s crucial to mix just until incorporated.
Overmixing? a big no-no. we’re aiming for that fluffy cake texture .
When it comes to baking , divide your batter into prepared pans. bake for 30 minutes or until a toothpick comes out clean.
Trust me, pull it out a little too early, and you'll end up with a gooey mess. but wait! rest those cakes for 10 minutes before moving them to a cooling rack!
Expert Techniques
Let’s geek out over a few expert techniques. first, check the quality of your ingredients. use black cocoa powder for that rich flavor.
Remember to embrace the buttermilk cake recipe for added moisture and fluff. also, pay close attention to your frosting. a smooth cream cheese frosting recipe will elevate the cake to heavenly.
If things go south, don’t panic! If the cake sinks, it might have needed more baking time or you might have opened the oven door too much.
Success Strategies
So, what common mistakes should you avoid? well, don’t rush through the chilling stage! patience is key. let that frosting set for 30 minutes before slicing.
Also, make sure your cake layers are even. layering is where it gets tricky—eye-balling it can lead to wonky cakes! if you’re feeling fancy, chocolate ganache is an indulgent sweats alternative for frosting.
Lastly, have fun with serving ideas! serve your cake with a scoop of ice cream or some fresh berries. homemade cake ideas can be made ahead of time for those last-minute gatherings.
A little planning goes a long way!
In summary, cooking doesn't have to be daunting. by mastering these professional cooking methods, you can whip up cakes and other delightful dishes for your celebrations, or even just a cozy night in.
Now, get ready for that bonus section where we dive deeper into additional tips and tricks for your baking adventure!
look into into the Decadence: Bake Black Velvet Cake - Indulge in Decadence
Oh, my gosh, have you ever tasted something so good you just wanna keep it a secret? well, this black velvet cake is one of those treasures! it's like the rich and mysterious sibling of the classic red velvet.
And trust me, it’s not just about looks—this cake is genuinely delicious. let’s get into some additional recipe information that will help you elevate your baking game, whether you’re a novice or a kitchen pro.
Pro Tips & Secrets for Your Best Cake
First off, let’s talk about some secrets i’ve picked up over the years. room temperature ingredients are key, folks! it helps with achieving that fluffy cake texture that we all crave.
Make sure your eggs and buttermilk sit out for a bit before you mix ‘em in.
When you’re combining the wet and dry mixtures, don’t go all out and overmix. just fold them together until you see no dry flour.
Trust me, this little tip will keep your cake from being dense, making it more like a traditional decadent chocolate cake .
If you’re short on time (who isn’t, right?), you can prepare your batter a day in advance. just keep it covered in the fridge and bake it when you’re ready.
Voila, instant convenience!
Perfect Presentation: The Art of Plating
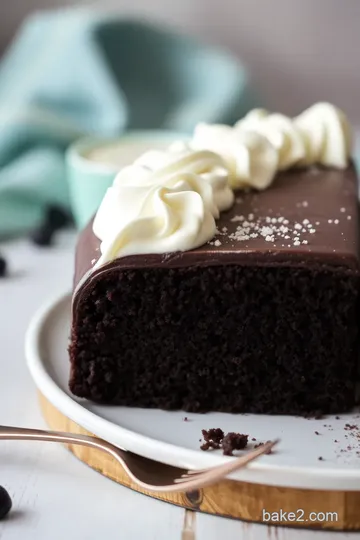
Now, let’s chat about how to make your black velvet cake look as good as it tastes. after all, we eat with our eyes first! once your cake is frosted, try using a spatula to create some fun swirls in the frosting.
It's all about displaying those fluffy layers.
For a little flourish, consider garnishing with a sprinkle of black cocoa powder or some fresh berries on top. trust me; the contrast of colors makes for a stunning presentation.
Plus, the fruity freshness pairs beautifully with this rich dessert —talk about a win-win!
Storage & Make-Ahead Magic
So you’ve baked your cake and it’s beautiful… now what? if you’ve got amazing leftovers (unlikely, i know, but just in case), let’s make sure they stay fresh.
Store your cake in an airtight container in the fridge for up to a week. but, to be real, it probably won’t last that long with how good it is!
If you want to make it ahead of time, you can always freeze the layers. just make sure they cool completely, wrap them tightly, and pop them in the freezer.
When you’re ready to whip it out for a special occasion, let it defrost in the fridge overnight!
Creative Variations for the Adventurous Baker
Let’s get creative! there are tons of ways to switch things up . wanna spice things up for a holiday? try adding some peppermint extract to the frosting! or if you’re feeling speculative, how about a vegan cake option ? swap out the eggs for flax eggs and use some plant-based butter.
It’s still decadent, i promise.
You can even use different frostings. Ever thought about a chocolate ganache recipe instead of cream cheese? Give it a go; you won’t regret it!
Complete Nutrition Guide: Know Your Cake
I know, i know… we’re here for indulgence, but it’s good to be aware of what’s in that heavenly slice.
Here’s the breakdown: a slice of this black velvet cake packs about 400 calories . yep, it's rich. but it also delivers some great satisfaction, and let’s be honest—everyone deserves a little fun in their life, right?
And hey, if portion control is a concern, cut smaller slices. You’ll still feel satisfied without overdoing it!
Got Questions? Here Are Some Answers
I bet there are some questions bubbling up. like, what if my cake doesn’t rise? first, make sure your baking powder and soda aren’t expired.
Also, follow those mixing tips i shared earlier—no overmixing!
And about decoration: if you ever mess up that frosting job, just hide it with some berries or decorative chocolate shavings. Trust me, nobody will know the difference.
Wrapping It All Up
So there you have it! whether you’re looking for easy cake recipes for everyday sweetness or want to impress friends with stunning cakes for special occasions , this black velvet cake has got you covered.
Embrace the decadence and have fun in the kitchen! Remember, baking is all about joy, laughter, and maybe a little chaos—who cares if things get messy? So grab your apron, and get ready to Bake Black Velvet Cake - Indulge in Decadence like the rock star you are!
Bake Black Velvet Cake - A Delicious Indulgence Card
⚖️ Ingredients:
- 2 cups (250g) all-purpose flour
- 1 and 1/2 cups (300g) granulated sugar
- 3/4 cup (75g) unsweetened cocoa powder
- 1 teaspoon baking soda
- 1 teaspoon baking powder
- 1/2 teaspoon salt
- 1 cup (240ml) buttermilk, room temperature
- 1 cup (240ml) vegetable oil
- 2 large eggs, room temperature
- 2 teaspoons pure vanilla extract
- 1 tablespoon black food coloring (optional, for deeper color)
- 8 oz (225g) cream cheese, softened
- 1/2 cup (115g) unsalted butter, softened
- 4 cups (480g) powdered sugar
- 2 teaspoons pure vanilla extract
- 2 tablespoons heavy cream (or milk for a lighter version)
🥄 Instructions:
- Step 1: Preheat your oven to 350°F (175°C) and grease the cake pans.
- Step 2: In a large mixing bowl, whisk together flour, sugar, cocoa powder, baking soda, baking powder, and salt until evenly mixed.
- Step 3: In a separate bowl, combine buttermilk, vegetable oil, eggs, vanilla extract, and food coloring (if using). Mix until well blended.
- Step 4: Gradually add the wet ingredients to the dry, mixing until just combined. Avoid overmixing.
- Step 5: Divide batter evenly between prepared pans. Bake for 30 minutes or until a toothpick inserted into the center comes out clean.
- Step 6: Let cakes cool in pans for 10 minutes, then transfer to a cooling rack to cool completely.
- Step 7: In a medium bowl, beat cream cheese and butter together until creamy. Gradually add powdered sugar, mixing until smooth. Stir in vanilla and heavy cream.
- Step 8: Once cooled, frost the top of one cake layer, top with the second layer, and frost the top and sides of the cake.
- Step 9: Chill for 30 minutes to set frosting, slice, and enjoy!
Previous Recipe: How to Make the Best Air Fryer Churros - Crispy Sweet Treats!
Next Recipe: Ultimate Bake Quesillo: Sweet Venezuelan Flan Delight to Savor