Decadent Fudgy Brownies in Brownie Bakeware
Have you ever tasted the most fudgy brownies? This easy recipe uses brownie bakeware for perfect results every time! Let’s bake something delicious together!

Unleashing the Joy of Brownies
You know that moment when the smell of chocolate fills your kitchen, and you just can’t resist sneaking a taste of the batter? oh my gosh, it’s like chocolate heaven! baking brownies has been a family tradition in my home.
It started with my grandma’s fudgy brownie recipe, which she made every holiday. no matter how tough the day was, a bite of her brownies could turn everything around.
Now, let’s dive into why brownie bakeware is your best friend for whipping up some deliciousness!
A Sweet Slice of History
Brownies are not just any dessert. they’ve got a rich american history, first emerging in the late 19th century. can you believe that? from their humble beginnings in the u.
S. to being beloved worldwide, brownies have earned their spot at our dessert table. today, they're everywhere, from bakeries to sunday dinners, thanks to their easy prep and delightful taste.
Trust me, these aren't just your average sweets – they are rich chocolate brownies made to satisfy the deepest cravings.
When you think about it, brownie baking time is such a quick escape from reality. you’ll need about 15 minutes prep and 25- 30 minutes of magical baking.
Seriously, in under an hour, you can have perfectly moist brownies ready to go. and let’s not forget, with just a few simple chocolate brownie ingredients , you can create a dessert that feeds the whole family – talk about a win-win!
Why Brownies?
Let’s chat about the benefits of baking these bad boys. first off, we’re talking health benefits here (kind of!). most brownie recipes are pretty straightforward: butter, sugar, cocoa powder, and eggs.
And who can resist that chocolate goodness? brownies can also be made gluten-free or packed with nuts for a nutty brownie idea.
Yum!
You might wonder, when should you serve these fudgy delights? honestly, the options are endless! whether it’s a cozy family movie night or a potluck, brownies are a crowd favorite.
They’re also killer for bake sales or any special occasion. heck, even just a tuesday afternoon can be a perfect excuse to whip out that non-stick brownie pan and get down to business.
The Do’s of Brownie Baking
Now, let’s not forget some crucial brownie baking tips to ensure that every batch comes out perfect:
- Use Room Temperature Eggs: They blend seamlessly into the mixture, giving you that dreamy texture.
- Don’t Overmix: The less you mix, the fudgier the brownies. So, keep it chill!
- Check for Doneness: Aim for those few moist crumbs on your toothpick. Trust me, overbaking is a tragedy in the brownie world.
- Cooling Time: Let those brownies cool completely. It makes cutting easier and enhances the flavor!
With the right baking essentials and your trusty brownie bakeware , you can experiment with all kinds of brownie variations.
Have you ever tried a caramel brownie recipe or tossed in some chocolate chips for that chocolate chip brownie kick? each bite can be a new adventure!
The Perfect Ingredients
So, there you have it – a whole world of brownies awaits you! from easy brownie recipes to indulgent rich chocolate brownies , it all starts with a few key ingredients and the best tools at your disposal.
Up next, i’ll share with you all the goodies you’ll need to create these decadent treats. let’s get ready to make some magic in the kitchen!

Essential Ingredients Guide
Oh my gosh, let’s talk about the essential ingredients for making those mouthwatering brownies everyone dreams about! this guide will help you gather the premium core components you need.
Ready to dive in?
Premium Core Components
First things first, let's get specific about detailed measurements . whether you’re using us cups or metric grams, it’s crucial to be accurate to get those rich, fudgy brownie results every time.
For instance, you need 1 cup (226g) of unsalted butter for that perfect texture.
Quality is key, folks! look for indicators of freshness when selecting your ingredients. when you’re shopping for eggs, you want the ones that feel heavy and have a clean shell.
Trust me, nothing ruins your baking vibes faster than spoiled eggs.
And let’s not forget about storage guidelines and shelf life ! keep your flour in a cool, dry place; it’s best used within 6-8 months.
Cocoa powder? it lasts way longer — up to two years if stored properly!
Wanna make sure your stuff is fresh? Always check expiration dates and trust your nose. If it smells funky, toss it!
Signature Seasoning Blend
Now onto the signature seasoning blend . brownies need some love from spices too! mixing in a bit of vanilla extract is like giving your batter a warm hug.
Adding a dash of salt brings out the chocolate flavor like no other.
And speaking of chocolate, how about some herb selections ? i know it sounds wild, but experimenting with herbs like rosemary or mint can create a unique brownie twist.
Just a hint, though!
Don’t forget flavor enhancers! aromatics like a sprinkle of espresso powder can make those chocolate brownie ingredients pop. and if you’re feeling adventurous, throw in some sea salt on top right before baking.
Trust me; it’s heavenly!
Smart Substitutions
Okay, let’s tackle those smart substitutions because life isn’t always about having every ingredient on hand. you’re out of eggs? use applesauce or mashed bananas instead — it works wonders in an easy brownie recipe .
If you’re in a pinch with your brownie pan , don’t sweat it! a muffin tin can do the job in a snap.
Just remember to shorten your brownie baking time since smaller portions cook faster.
And let’s be real; dietary modifications are a must for some folks. if you’re going gluten-free, a 1:1 flour substitute works just fine.
There are so many brownie variations you can create based on what you’ve got stashed in your kitchen.
Kitchen Equipment Essentials
Now, let’s chat about your kitchen equipment essentials . honestly, having the right tools makes life so much easier. a good brownie bakeware —whether it’s an 8x8 or 9x9 non-stick brownie pan—will give you those perfectly moist brownies.
No one wants a sticking disaster!
Don’t skimp on your mixing bowls either. you’ll want some that can take a beating when you whip up that brownie mix.
And a whisk? absolute necessity! it’s shocking how quickly everything can come together with just a few twirls.
Also, keep an eye out for rubber spatulas. They love to hug the sides of your mixing bowls, making sure not a drop of that luscious batter is wasted!
Once those brownies are baked to perfection, you’ll need proper storage solutions to keep them fresh. airtight containers are your best friend here.
Keep those homemade brownies tucked away and waiting for you!
And with all that knowledge, you’re one step closer to mastering the art of baking brownies. Excited to jump into the step-by-step instructions for your decadent fudgy brownies in brownie bakeware ? Let’s do this!
Professional Cooking Method
Making decadent fudgy brownies isn’t just about tossin' some ingredients together; there’s a real art to it. with a few simple guidelines, you can elevate those homemade brownies to dessert royalty.
Let’s jump into the professional cooking method —from essential prep to expert techniques.
Essential Preparation Steps
First off, let’s chat about mise en place . this fancy french term just means having everything in its place. measure out your ingredients before you start.
That way, you won’t be frantically searching for that cup of granulated sugar midway through. ain’t nobody got time for that!
Now, let’s talk about time management . you’re going to need about 15 minutes of prep time and then about 25- 30 minutes for baking .
That means you can multitask—get your yummy brownie batter prepped while your oven is heating. and don’t forget about organization strategies ! keep your workspace tidy.
You’ll be amazed at how smooth things go when your kitchen isn’t a total mess.
Safety considerations ? Always. Let’s not burn our hands, shall we? Keep those oven mitts on hand because things will get hot, hot, hot!
Step-by-Step Process
Here’s your clear path to brownie bliss:
- Preheat your oven to 350° F ( 175° C) .
- Grease your brownie pan with a non-stick spray. This makes for easy removal after baking.
- Combine melted butter and sugar until smooth, then add in those lovely eggs. Don’t rush this—you want a silky batter.
- Sift together your dry ingredients: flour , unsweetened cocoa powder , salt , and baking powder . Fold these in gently to avoid overmixing.
- Pour the batter in and bake for 25- 30 minutes . A toothpick check is crucial here—aim for a few moist crumbs, not a clean pick. That’s the secret for perfectly moist brownies .
Expert Techniques
Now, let’s get a bit nerdy with some expert techniques .
- Ensure you have quality brownie bakeware. A good non-stick brownie pan can be a game-changer, trust me.
- Pay attention to critical steps . For instance, whisk your butter and sugar until the sugar is fully dissolved. This affects how fluffy your brownies will be!
- Set up quality checkpoints . After mixing, give your batter a quick taste (raw egg caution aside) to see if the sweetness is to your liking.
- Troubleshooting? If your brownies turn out too dry, next time consider reducing baking time.
Success Strategies
Want those brownies to wow your friends? Let’s avoid some classic kitchen mistakes. Don’t go overboard with mixing—it should just be combined.
For quality assurance , always use room temperature eggs . this helps everything mix more smoothly. and hey, if you’ve got some leftover brownie mix, don’t fret! you can always make those chocolate chip brownies or even try out a caramel brownie recipe .
Want to get ahead? these brownies keep well, so why not bake a batch in advance? just remember to allow for some cooling time before you dive in—about 30 minutes is perfect.
Additional Information
So, armed with these tips and tricks, you’re ready to create a batch (or two) of those rich chocolate brownies that everyone loves! whether you’re whipping them up for a casual weekend treat or looking to impress at a bake sale, this easy brownie recipe is a keeper.
Remember, the right brownie bakeware can make all the difference.
Get ready to chow down on homemade brownies that might just become your new go-to recipe.
Additional Recipe Information: Unleashing The Brownie Magic
Oh my gosh, are you ready to take your brownie game to a whole new level? we're diving deep into everything you need to know about crafting the ultimate brownies in your brownie bakeware .
Whether you’re using a non-stick brownie pan or a good ol’ regular one, let’s explore some pro tips, presentation secrets, storage hacks, creative variations, and nutrition info that will make your brownies the talk of the town.
Pro Tips & Secrets
Honestly, the key to fudgy brownies lies in a few insider secrets. First off, make sure your chocolate brownie ingredients are high-quality. The better the chocolate, the richer the flavor, ya know?
For time-saving techniques, pre-measure your ingredients before you start mixing. trust me, it saves chaos and keeps you focused! another little trick? for that rich chocolate goodness, swap half of your cocoa powder with melted chocolate.
It gives you those melt-in-your-mouth brownies you've been dreaming of.
Regarding presentation, don’t underestimate the power of a nice sprinkle of sea salt atop your brownies right before baking. it elevates the flavor and looks super fancy too.
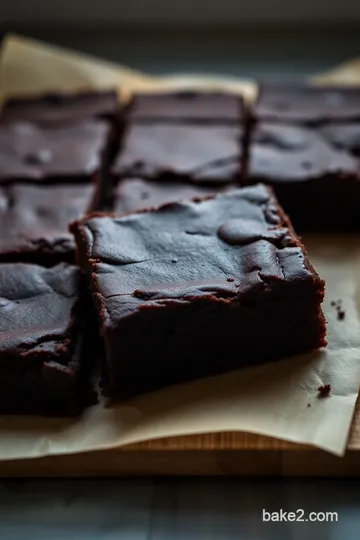
To plate your brownies, cut them into perfect squares, and stack them for a wow-factor on your dessert table!
Perfect Presentation
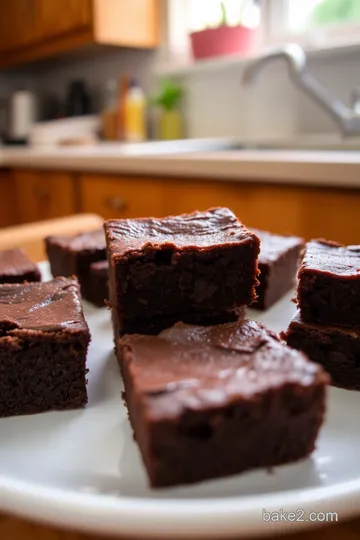
Speaking of presentation… let’s make those brownies look as fabulous as they taste. a simple way to plate them? use a clean, white plate.
The contrast with the dark brownies makes them pop!
For garnish ideas, think chocolate chips, crushed nuts, or fresh berries. use bright colors to create a feast for the eyes.
You could even drizzle some homemade caramel over the top—talk about decadence!
When discussing visual appeal , remember: less is more. a couple of thoughtful garnishes will do wonders. stack your brownies casually, and maybe add a dusting of powdered sugar for that final touch.
Storage & Make-Ahead
So, what happens if you can’t finish all those perfectly moist brownies? well, that’s never a problem in my book! to store, wrap them tightly in plastic wrap or aluminum foil and pop 'em in an airtight container.
They’ll stay fresh for about 4-5 days at room temperature.
For longer preservation, you can freeze brownies! just slice them up and wrap each piece individually. they can last in the freezer for about 3 months .
Just remember to let them thaw in the fridge overnight before indulging.
When reheating, toss ‘em in the microwave for about 10-15 seconds . Serve them warm with a scoop of ice cream for an effortless dessert fix.
Creative Variations
Let’s talk brownie variations because the sky’s the limit. Got a craving for something nutty? Toss in chopped walnuts or pecans right into your mix. Trust me; the texture is sensational.
For a seasonal twist, consider adding a bit of pumpkin puree in the fall or a splash of peppermint extract for a holiday cheer vibe.
Got dietary restrictions? no sweat! you can totally make gluten-free brownies with a simple 1:1 gluten-free flour blend.
And if you're in the mood for something sweeter, swap regular chocolate chips for white chocolate ones or try experimenting with swirls of peanut butter for a creamy touch.
Complete Nutrition Guide
Now, let’s get real about the nutrition. here’s the skinny on your brownies: a typical serving has about 240 calories —not too shabby, right? if you think about it, homemade brownies can be a sweet snack without sacrificing your health goals.
Brownies pack some serious benefits too! you get a boost of antioxidants from the cocoa powder, which can be a nice perk.
Just remember to enjoy them in moderation. portion control is key, folks! serving size is around one square, so even if those brownies are calling your name, keep it simple!
Expert FAQ Solutions
Now, if you’re thinking, “what if my brownies turn out dry?” that could happen if you overbake them! keep an eye on the timer—around 25- 30 minutes should do the trick for perfectly moist brownies .
If your brownies seem too gooey, they probably just need a little more time. a toothpick should come out with a few moist crumbs, not just wet batter .
And if you find yourself with leftover brownie mix, just save it for tomorrow or make some fun brownie mix cookies!
Conclusion
So there you have it! armed with all this info, you’re ready to whip up some epic brownies in your favorite brownie bakeware .
Whether you opt for a simple easy brownie recipe or experiment with those decadent variations , these tips will have you baking like a pro.
Remember, the joy of baking comes from feeling free to tweak and adjust things to your taste. happy baking, and may your brownies always be delicious!
Decadent Fudgy Brownies in Brownie Bakeware Card
⚖️ Ingredients:
- 1 cup (226g) unsalted butter, melted
- 2 cups (400g) granulated sugar
- 4 large eggs
- 1 teaspoon pure vanilla extract
- 1 cup (120g) all-purpose flour
- 1 cup (90g) unsweetened cocoa powder
- ½ teaspoon salt
- ½ teaspoon baking powder
- 1 cup (170g) semi-sweet chocolate chips (optional)
🥄 Instructions:
- Step 1: Preheat the oven to 350°F (175°C).
- Step 2: Grease the brownie bakeware with non-stick spray or line with parchment paper.
- Step 3: In a large bowl, combine melted butter and granulated sugar until smooth. Whisk until fully incorporated.
- Step 4: Add eggs one at a time, mixing well after each addition.
- Step 5: Stir in vanilla extract.
- Step 6: In a separate bowl, sift together flour, cocoa powder, salt, and baking powder.
- Step 7: Gradually fold dry ingredients into the wet mixture using a rubber spatula. Mix until just combined; do not overmix.
- Step 8: Fold in chocolate chips, if using.
- Step 9: Pour the batter into the prepared brownie bakeware.
- Step 10: Bake for 25-30 minutes, or until a toothpick inserted into the center comes out with a few moist crumbs.
- Step 11: Allow brownies to cool in the pan before slicing into squares.
Previous Recipe: Guide to What is a Baker's Pantry: 5 Essential Ingredients to Start
Next Recipe: Ultimate Comfort: My Grandma's B&M Baked Beans Recipe!