Fried Oreo Cookies
Ever wondered how to elevate a classic treat? These Fried Oreo Cookies: Sweet, Crunchy Goodness! are golden, crispy bites of joy—perfect for parties or midnight snacks.

- Get Ready for Fried Oreo Cookies: Sweet, Crunchy Goodness!
- A Bit of History for the Sweet Tooth
- Why You Need to Make These Fried Oreos
- Whipping Up Those Sweet Treats
- Essential Ingredients Guide
- look into into Deliciousness: The Professional Cooking Method
- Pro Tips & Secrets for the Ultimate Fried Oreo Cookies
- Perfect Presentation: Make ‘Em Pretty!
- Storage & Make-Ahead Tips
- Creative Variations: Get Experimental
- Complete Nutrition Guide: Know What’s on Your Plate
- Expert FAQ Solutions: All You Need to Know
- Wrapping It Up
- Recipe Card
Get Ready for Fried Oreo Cookies: Sweet, Crunchy Goodness!
So, picture this: it's a hot summer day at the county fair. the sun is blazing, kids are laughing, and the smell of something oh-so-sweet wafts through the air.
You stroll by a vendor, and bam! there it is— fried oreo cookies: sweet, crunchy goodness! if you’re anything like me, that combo of a classic chocolate cookie deep-fried in a golden coating pulls at your heartstrings.
You know those moments when food feels like a warm hug? yeah, that’s what you get with this delectable treat.
Let’s not lie—who hasn’t craved a bit of that comfort food vibe while lounging on the couch or hosting a party? deep-fried snacks transformed into the ultimate candy bar? yes, please! trust me, these crispy little bites of joy will be the star of your next gathering or a naughty midnight snack that’ll have you sneaking bites when no one’s looking.
A Bit of History for the Sweet Tooth
The art of frying cookies isn’t new. fried desserts have graced fairgrounds and diners for ages, with origins steeped in amusement park culture.
Just think about it: every summer, people rush to indulge in carnival treats! it’s fun food that brings everyone together.
Today, fried oreo cookies continue to hold court, winning the hearts (and taste buds) of dessert lovers everywhere.
When you whip up this recipe, you’re not just making a dessert; you’re joining a tradition of sweet indulgence. plus, with just about 55 minutes of your time, you’ll have 12 golden, crunchy segments of cookie heaven —easy enough for even the busiest cooks.
Why You Need to Make These Fried Oreos
Let’s talk about the good stuff ! first off, these cookies pack a punch of nostalgia. they’re the kind of dessert that keeps those fun fair vibes alive.
Who wouldn’t want a sweet snack that transforms a regular chocolate cookie into something utterly magical?
Now, if we’re diving into the health aspect (although i’m sure you’re not here for a nutrition lecture), remember that a little of these sweet treats is all about balance.
They can be side-lined during parties, standing up against your other crowd-pleasing treats, or, let’s be real—just a cozy dessert with your evening tea.
Plus, they’re super easy dessert recipes —no fancy techniques needed.
Want to impress your guests? serve these with a scoop of ice cream, and you’ve turned a simple cookie into a glorious dessert that feels fancy but is totally approachable! throw in some dipping sauces for a next-level experience.
Trust me —a drizzle of chocolate sauce or berry compote will elevate these fried sweets into the stratosphere.
Whipping Up Those Sweet Treats
Alright, i hope you're fired up about making these fried oreo cookies ! with the simple ingredients—just oreos, flour, and a splash of buttermilk—you’re already halfway there.
The key to this easy dessert is the batter. when you coat those cookies with a crispy coating and fry them to perfection, you’ll be treated to a heavenly contrast of warm, gooey centers and crunchy outsides.
Just thinking about it makes my mouth water!
But let's be real for a second: frying can be tricky. getting that oil temperature right is crucial. too hot, and you turn into the local fire department's next call; too low, and your cookies soak up that oil like a sponge.
But don’t stress! we’re gonna make it work together.
Now that you’re all prepped and excited to dive into this unique dessert idea, grab your ingredients and let’s make some magic happen! grab a comfy spot because we’re about to turn some ordinary oreos into something extraordinary.
Get ready for a treat that screams fun, joy, and a little bit of mischief.
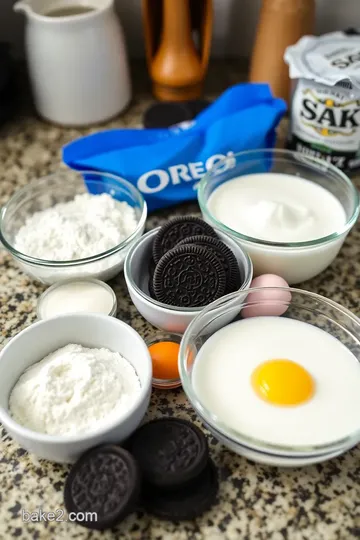
Essential Ingredients Guide
Let’s dive into the heart of your kitchen to explore the essential ingredients you need for fried oreo cookies: sweet, crunchy goodness! first, let me just say, making fried desserts at home is not only fun but also a fantastic way to induce some serious comfort food feels.
Trust me, if you’re craving carnival treats but can’t get to the fair, this recipe will satisfy that urge right from your kitchen.
Premium Core Components
When it comes to ingredients, details matter. Here’s a breakdown of what you’ll need:
-
All-Purpose Flour: 1 cup (120g). Look for a brand that has a fine texture. Check the expiration date; fresh flour will make your batter light.
-
Granulated Sugar: 1 tablespoon (12g). A quick tip: if it feels clumpy, it’s time to switch it out.
-
Baking Powder: 1 teaspoon (4g). This is your magic ingredient – it helps things rise. Store it in a cool, dry place; it’s best used within 6 months.
-
Salt: 1/4 teaspoon (1g). Always use fine salt for an even distribution in your batter.
-
Buttermilk: 1 cup (240ml). It’s key for a tender donut-like batter! If you don’t have any, mix regular milk with a splash of vinegar and let it sit for five minutes.
-
Vanilla Extract: 1 teaspoon (5ml). A splash of quality vanilla can elevate your cookies. Look for the real stuff, not the imitation.
Storage Tip: Store dry ingredients in airtight containers to keep them fresh longer.
Signature Seasoning Blend
Let's jazz up those flavors a bit with some signature herb and spice combinations. while this recipe doesn’t require elaborate spices, adding a pinch of cinnamon to your batter can add a warm hint that pairs wonderfully with the chocolate cookies.
Regional flavors can spice things up! Think about adding crushed nuts, or even swapping in a different cookie flavor like peanut butter or mint Oreos. Get creative, my friend!
Smart Substitutions
Sometimes life happens, and you find yourself missing an ingredient. No biggie! Here are a few easy swaps:
-
Flour Alternatives: If you need a gluten-free option, try a gluten-free flour blend.
-
Sugar Alternatives: Use coconut sugar or a sugar alternative if you’re keeping it light.
-
Emergency Replacements: If you’re out of buttermilk , vinegar and milk—or even yogurt—work like a charm.
-
Seasonal Options: If you’re feeling adventurous, use seasonal cookie flavors like pumpkin spice Oreos in the fall!
Kitchen Equipment Essentials
Before you dive into these easy dessert recipes , make sure you have your tools ready:
-
Deep Frying Pan or Heavy Pot: You need something deep enough for your oil, so go big or go home!
-
Slotted Spoon: This is your best friend for removing those crispy delights from the hot oil.
-
Mixing Bowls & Whisk: Simple, but essential for getting your batter nice and smooth.
-
Cooking Thermometer (optional): Get that oil temperature to 350° F ( 175° C) for the perfect fry.
-
Paper Towels: For draining excess oil.
-
Tongs: Advance your snatch-and-go technique for those cookies!
Prep Tip: Gather all your ingredients before starting to keep things smooth and flowing.
Now that you’ve got the 411 on the essentials, let’s get going on these fried oreo cookies that are bound to knock the socks off your guests—or be your favorite midnight snack.
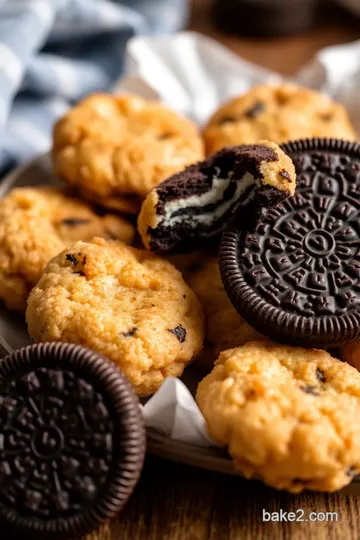
Just imagine sinking your teeth into that crispy coating, melting chocolate, and creamy filling! definitely a crowd-pleaser treat that’s ready for any party or just because you deserve something sweet!
Get ready to dive into the step-by-step instructions for making these delightfully decadent snacks! Your sweet journey is about to begin.
look into into Deliciousness: The Professional Cooking Method
Alright, folks! if you’ve ever wondered how to turn those classic oreo cookies into something out of your wildest dessert dreams, get ready for fried oreo cookies: sweet, crunchy goodness! .
Now, let's break down the secrets of professional cooking methods so you can create mouthwatering fried desserts that feel like they belong at the fair—but from the comfort of your own kitchen!
Essential Preparation Steps
First things first. before you dive into frying those babies, let’s talk about mise en place . this french culinary term basically means “everything in its place.
” gather your ingredients first. you're gonna need some oreo cookies , flour, sugar, and, of course, that magical thing called buttermilk .
Next, time management is key. we’re looking at about 15 minutes of prep and 30 minutes of chilling .
Those cold cookies are gonna fry up beautifully! give yourself enough time to hit all the steps without feeling like a racehorse at the starting line.
And let’s not forget safety considerations ! when frying, make sure to keep a close eye on your oil temperature, aiming for about 350° f ( 175° c) .
A good thermometer can save the day, or if you’re feeling daring, drop a tiny bit of batter in—it should sizzle!
Step-by-Step Process
Alright, let’s get down to the nitty-gritty. Follow these steps, and you’ll create some serious crowd-pleaser treats .
-
Prepare the batter : Whisk together your flour, sugar, baking powder, and salt. Then add in that buttermilk and a splash of vanilla. Make sure it's smooth!
-
Chill time : Cover your batter and throw it in the fridge for 30 minutes . Trust me, this step is golden!
-
Heat the oil : Heat your frying pot over medium-high. Get that oil nice and hot—350° F ( 175° C) is what we’re aiming for.
-
Dip time : Carefully coat each Oreo in the batter. Get it all sticky and covered, y’all!
-
Fry those cookies : Slide them into the hot oil. Fry them up 2- 3 minutes per side until they’re golden brown.
-
Drain and serve : take them out with a slotted spoon. let them rest on some paper towels to get rid of any extra oil.
A sprinkle of powdered sugar on top? yes, please!
Expert Techniques
When you get to this point, you want to make sure everything is just right.
- Quality checkpoints : After frying, check for that crispy coating ; it should be hard but not burnt.
- If they're not frying right, troubleshoot! Maybe the oil wasn't hot enough, or you overcrowded the pan. Both can lead to sad, greasy cookies.
Success Strategies
Let's keep you from making the classic mistakes. Here are a few pro tips:
- Don’t skip the chilling ! It makes a difference.
- Keep your oil temperature consistent. Too low, and they’ll be soggy. Too high, and they’ll burn. Aim for 350° F ( 175° C) .
- Don't get impatient while frying. If you watch the clock, frying shouldn’t take much longer than 10 minutes total .
And if you’re feeling a little adventurous? Try using flavored Oreos or adding some cinnamon to the batter for a twist!
Wrap It Up!
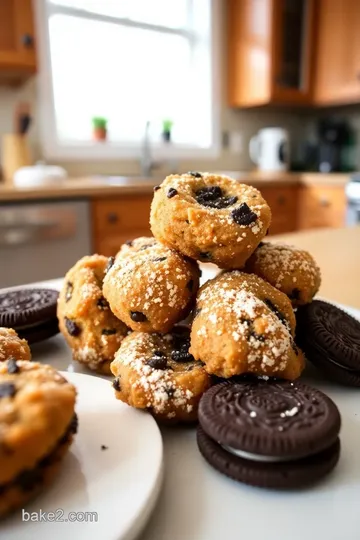
If you follow these steps and tips, you'll have some stunning fried oreo cookies that are perfect for parties or your next binge-watching session.
Imagine them fresh out of the fryer, crispy and warm. pair them with a scoop of ice cream or some neat dipping sauces, and you've got yourself an epic sweet indulgence.
Don't forget, folks, “Fried Oreo Cookies: Sweet, Crunchy Goodness!” will totally blow your friends' minds. Now, let’s slide into our last section: Additional Information…
Pro Tips & Secrets for the Ultimate Fried Oreo Cookies
Alright, let’s get into the nitty-gritty of transforming those classic oreos into fried oreo cookies: sweet, crunchy goodness! first things first: time-saving tricks and some chef secrets that'll impress your friends and family.
When frying, keep your oil at around 350° f ( 175° c) —that’s the sweet spot for frying up deliciousness without burning.
If you don't have a thermometer, just drop in a bit of batter; if it sizzles and floats to the top, you're ready to roll.
Oh, and don’t overcrowd the pot! give each cookie some space to get that perfect crispy coating.
Speaking of crispy, mix in a pinch of cinnamon or nutmeg into your batter for an unexpected flavor boost. it adds a little warmth, perfect for those chilly nights or when you just want to feel cozy.
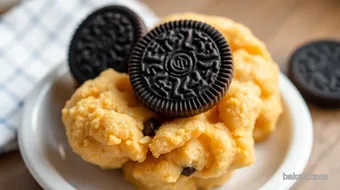
For presentation, dust them with powdered sugar right before serving—it’s fancy and adds a touch of elegance to your delicious fried desserts .
Perfect Presentation: Make ‘Em Pretty!
Let’s chat about how to wow your guests with some killer plating techniques. It’s all about those visual vibes, babe! Stack your Fried Oreo Cookies on a cute platter, with a scoop of vanilla ice cream nestled beside them—it’s like the Instagram pic you’ve been dreaming of!
For garnishes, consider some fresh berries or a drizzle of chocolate sauce on the plate. the contrast of colors makes the whole thing pop.
Use white plates; it really lets that rich chocolate and fried goodness shine. trust me, a little presentation goes a long way in making your crowd-pleaser treats even more enjoyable!
Storage & Make-Ahead Tips
Now, let’s get real about storage and reheating. if you find yourself with leftovers (and let’s be honest, that’s a big if), store them in an airtight container.
They’re best eaten fresh, but you can get away with keeping them in the fridge for a day or two.
You know, perfect for those midnight snacks!
When it comes to reheating, pop them back in the oven at 350° f ( 175° c) for about 10 minutes.
This’ll help them regain some of that crunch without turning soggy. just don’t nuke them in the microwave unless you want chewy, sad oreos.
If you’re wanting to prep ahead of time, you can make the batter a day in advance and chill it; just give it a good whisk before dipping your cookies.
Creative Variations: Get Experimental
Get ready to unleash your inner mad scientist with some fun fair food variations! want a chocolate explosion? dip those bad boys in melted chocolate after frying—heavenly! or if you're feeling adventurous, grab some flavored oreos—think mint-chocolate or peanut butter—and turn those into your next fried snack ideas.
If you’re catering to dietary preferences, swap out regular flour for almond flour or a gluten-free blend. you can even experiment with sweeteners; using coconut sugar can give a nice caramel flavor that pairs so well with deep-fried sweets.
The sky's your limit with these fried cookie variations !
Complete Nutrition Guide: Know What’s on Your Plate
Here's the scoop on how these fried oreo cookies stack up nutritionally. each cookie packs around 150 calories , with a bit of fat and sugar—can’t escape that.
But hey, it's a dessert! enjoy these in moderation and pair ‘em with some fresh fruit for a little boost in vitamins.
When you're planning portion sizes, aim for one or two cookies per person. it’s all about balance, y'all! maybe have a scoop of ice cream on the side to elevate your dessert with a satisfying creaminess.
Expert FAQ Solutions: All You Need to Know
I get a lot of questions about frying. here’s the deal: if your cookies absorb too much oil, your oil isn't hot enough.
If they're burning too quickly, turn it down a notch. if they’re breaking apart while frying, try chilling them longer.
Oh, and for those asking if you can use a non-frying method like baking, i mean, you can, but it won’t give you that legendary crunch that makes these fried oreo cookies truly irresistible.
Trust me on this!
Wrapping It Up
So, ready to dive into these delicious fried oreo cookies: sweet, crunchy goodness ? they’re a total blast to make and even more fun to share.
Whether for parties or just a cozy night in, these cookies are sure to win hearts and taste buds. enjoy each crunchy bite of comfort food bliss! go ahead and whip up this easy dessert recipe; i promise you won’t regret it.
Fried Oreo Cookies Card
⚖️ Ingredients:
- 12 Oreo cookies (regular size)
- 1 cup all-purpose flour (120g)
- 1 tablespoon granulated sugar (12g)
- 1 teaspoon baking powder (4g)
- 1/4 teaspoon salt (1g)
- 1 cup buttermilk (240ml)
- 1 teaspoon vanilla extract (5ml)
- Oil for frying (about 4 cups, depending on the pot size)
- Powdered sugar for serving (optional)
🥄 Instructions:
- Step 1: In a mixing bowl, whisk together the flour, sugar, baking powder, and salt.
- Step 2: Gradually add the buttermilk and vanilla extract, whisking until smooth.
- Step 3: Cover the batter and refrigerate for at least 30 minutes to thicken.
- Step 4: In a deep frying pan or pot, heat the oil over medium-high heat until it reaches 350°F (175°C).
- Step 5: Carefully dip each Oreo into the batter, ensuring it is fully coated.
- Step 6: Gently place the coated Oreos into the hot oil in batches, ensuring not to overcrowd.
- Step 7: Fry until golden brown, about 2-3 minutes per side.
- Step 8: Remove the Oreos with a slotted spoon and drain on paper towels.
- Step 9: Dust with powdered sugar before serving.
Previous Recipe: How to Savor Midnight Grapes for Good Luck Treats: 5 Delicious Ideas
Next Recipe: Absolutely Delicious Grill Tofu Spam Musubi - Quick & Easy Treat