Decadent Cookies and Cream Cake Pops
Have you ever craved the perfect blend of cake and cookies? Make Cookies and Cream Cake Pops in 50 Mins and enjoy a heavenly treat that's both fun and delicious!

- Getting Started with Cookies and Cream Cake Pops
- A Sweet Journey Through Time
- Why You’ll Love These Cake Pops
- Your Journey to Deliciousness Begins!
- Your Go-To Essential Ingredients Guide for Cake Pops
- Let’s Get Baking!
- Mastering the Art of Making Cookies and Cream Cake Pops
- Pro Tips & Secrets
- Perfect Presentation
- Storage & Make-Ahead
- Creative Variations
- Complete Nutrition Guide
- Expert FAQ Solutions
- Recipe Card
Getting Started with Cookies and Cream Cake Pops
Oh, let me tell you, there’s something truly magical about cake pops. picture this: you’re standing in your kitchen, the mixer whirring away, as you whip up a batch of cookies and cream cake pops .
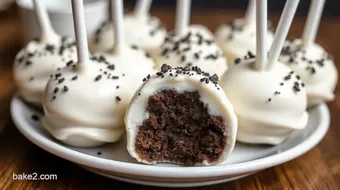
You take your first bite, and it’s a delightful explosion of flavors and textures—rich chocolate cake mixed with creamy vanilla frosting, all wrapped in a silky coating of white chocolate.
It’s downright decadent! make cookies and cream cake pops in 50 mins and impress the heck out of your friends or munch them all by yourself (no judgment here).
Now, let me ask you, have you ever had that moment where you need a quick dessert idea, but everything feels way too complicated? trust me, i’ve been there.
These cake pops are easy cake pops that your kids can help with, too. seriously, get the little ones involved in rolling those cake balls.
Just be prepared for a sprinkling of chaos (and maybe some sprinkles on the floor).
A Sweet Journey Through Time
The journey of cake pops is a delightful one! originating around the early 2000s, these chewy, sweet treats have exploded in popularity ever since.
They combine the beloved childhood classic—cake—with an adorable design, making them perfect for any occasion. whether it's a birthday party, a school event, or just a mid-week pick-me-up, they’re your go-to party dessert options .
As for your time commitment? it’s pretty straightforward! in just 50 minutes , including prep and chilling time, you’ll be savoring these delightful goodies.
That being said, while they’re typically quick, some attention to detail is crucial to nail that smooth chocolate coating.
When it comes to costs, you won’t break the bank. most ingredients are staples in your pantry, like flour and sugar, plus a few extra goodies for that creamy frosting and chocolate coating.
You can whip up about a dozen cake pops , so they are all about bringing joy to sharing without emptying your wallet.
Why You’ll Love These Cake Pops
First off, let’s chat health. now, i’m not saying these are health food, but there are definitely some aspects worth mentioning.
The chocolate cake gives you a comforting boost of energy, and if you bite into some of those cookie crumbles, it’s pure nostalgia!
These cake pops are the unique dessert ideas you've been searching for. with their cookies and cream flavor , they’ll be a hit with everyone, especially the kids.
And while we can’t always snack healthy, there’s comfort in knowing that homemade treats can still have some love behind them.
Got a special evening coming up? these are a great way to impress guests and double as a fun dessert recipe to keep things lively.
I mean, who doesn’t love decorating their own treats? you can get creative with your cake pop designs, using cute toppings or sprinkles to make them your own!
Your Journey to Deliciousness Begins!
So, ready to dive in? trust me; you’ll be amazed at how easily you can create these sweets at home.
Not only is it a fun project, but it’s also a great way to spend time with family, perfect for those kids baking projects .
With a few simple steps, you’ll make delightful cake pops that can be customized to fit any occasion or gathering.
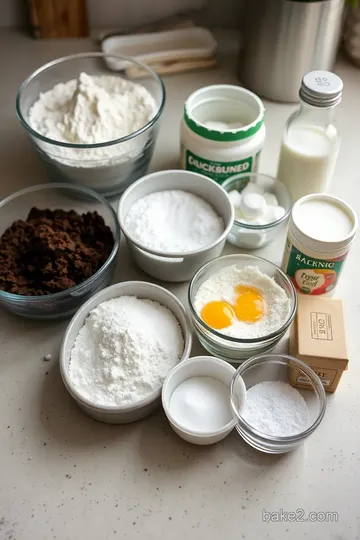
And to wrap things up, let’s pull out the ingredient list so you can get started on making those cookies and cream cake pops.
Because who wouldn’t want to impress their friends and family with these no-bake cake pops (or at least seem like a baking pro)? get ready, get set, and let’s roll those cake balls!
Your Go-To Essential Ingredients Guide for Cake Pops
Ready to whip up some delightful cookies and cream cake pops ? let’s break down everything you need to know about the essential ingredients to make it a breeze! trust me; you’re gonna love how easy and fun this all is.
Premium Core Components
First, let’s talk premium core components . You need to know what you’re working with!
-
Measuring magic: for most recipes, especially baked goods, accuracy is key. here’s a quick rundown: 1 cup all-purpose flour equals 120g .
For those who speak metric, this is super helpful, right? keep that scale handy!
-
Quality Checks: Look for fresh ingredients. For instance, flour should be free of lumps and unexpired, and cocoa powder should smell rich (not stale!).
-
Storage secrets: most dry goods will stay fresh for up to six months if kept in a cool, dry place.
But liquids? keep them tightly sealed in the fridge and use within a week .
-
Freshness Tips: When picking fresh produce or dairy, check for vibrant colors and check best-by dates. For example, half-and-half should smell clean and fresh!
Signature Seasoning Blend
Now, onto my favorite part — the signature seasoning blend !
-
Essential spice combos: for our cookies and cream cake pops , you don’t have to go wild with spices. just a dash of vanilla extract and a sprinkle of salt will elevate the flavors.
-
Herb Selections: Okay, herbs might not be your first thought for cake pops, but think about mint if you're feeling adventurous!
-
Flavor Enhancers: This is where flavor boosters come in. You could use a touch of almond extract. Just a little bit goes a long way!
-
Regional Variations: Did you know? In some places, they add a nutty twist to cake pops using local nuts. Go wild, and don’t hesitate to experiment!
Smart Substitutions
Life happens, and sometimes you just don’t have every single ingredient on-hand. Here are some smart substitutions :
-
Common Alternatives: If you're out of all-purpose flour, whole wheat can work in a pinch! Just remember, it may yield a denser cake pop.
-
Dietary Modifications: Wanna skip dairy? Swap milk for almond milk and use vegan butter in your frosting.
-
Emergency Replacements: Short on white chocolate? Use melted butterscotch chips instead! Just melt them down until smooth.
-
Seasonal Options: Use pumpkin puree in the fall or swap in crushed candy canes for winter treats. You can keep it fresh!
Kitchen Equipment Essentials
Having the right kitchen equipment makes a difference for your baking journey:
-
Must-Have Tools: Make sure you’ve got mixing bowls, a sturdy spatula, and a microwave-safe bowl. And don’t you dare forget the cake pop sticks !
-
Alternative Equipment: If you don’t have a cake pop stand, a styrofoam block works just as well!
-
Preparation Tips: Greasing your pans well is crucial to avoid any cake-related disasters. Trust me; no one wants a crumbling cake!
-
Storage Solutions: Keep your cake pops fresh by storing them in an airtight container. They’ll stay good in the fridge for about a week .
Let’s Get Baking!
Okay, now that we’ve covered all the nitty-gritty, it’s time to actually make those dreamy cookies and cream cake pops in 50 mins ! you'll be whipping up these sweet treats in no time.
Gather those ingredients, channel your inner baker, and let’s roll out some easy cake pops like you’ve never made!
The smell of chocolate and cookies will fill your kitchen and your friends will be begging for more! just remember, it’s not just about the treats; it’s about creating moments, indulging your sweet tooth, and having some fun along the way.
Happy baking!
Mastering the Art of Making Cookies and Cream Cake Pops
If you’re looking for a quick dessert idea that packs a punch in flavor and fun, you’ve landed in the right spot! today, we’re diving into a sweet little gem, cookies and cream cake pops .
You can make these delectable treats that blend the irresistible taste of chocolate cake with that creamy cookies and cream flavor.
Trust me; your friends and family will love these! plus, you can whip up a batch in just 50 minutes !
Essential Preparation Steps
First things first. mise en place is key. that fancy french term just means “everything in its place.” gather your ingredients and tools before you start.
You don’t want to be scrambling for the cocoa powder when your cake is halfway to the oven!
Now, let’s talk time management . while we're making cake pops, we’ll multitask like pros! preheating that oven to 350° f ( 175° c) while you mix your cake batter will save precious minutes.
And remember, timing is everything—start chilling your cake balls while the chocolate melts for that smooth coating later.
A little organization strategy goes a long way. keep your workspace tidy and plan your steps ahead of time. this makes everything flow smoother, trust me.
Lastly, safety first! when melting chocolate, keep an eye on it; burnt chocolate is a bummer . use a microwave in 30-second bursts or a double boiler to avoid disaster.
Step-by-Step Process
Alright, let’s get you started with a simple step-by-step:
-
Preheat Oven : Get that oven nice and hot at 350° F ( 175° C) .
-
Mix Your Batter :
- In one bowl, combine 1 cup of flour, 1 cup of sugar, ½ cup of cocoa powder, 1 tsp of baking powder, ½ tsp of baking soda, and ¼ tsp of salt .
- In another bowl, whisk together ½ cup of milk, 1 egg, ¼ cup of oil, and 1 tsp of vanilla . Now blend the wet into the dry until just mixed.
-
Bake : pour that luscious batter into a greased baking dish and pop it into the oven for 20- 25 minutes until a toothpick comes out clean.
Once done, cool it completely.
-
Make the frosting : beat ½ cup of softened butter and gradually incorporate 2 cups of powdered sugar and ½ cup of heavy cream until creamy.
Toss in ½ cup crushed cookies — it’ll make those pops sing!
-
Crumb & Combine : Crumble your cooled cake into a bowl and mix with the frosting. Roll into 1-inch balls and place ‘em on a baking sheet.
-
Chill : Stick those babies in the fridge for 15 minutes to firm up.
-
Melt the Chocolate : Melt 12 oz of white chocolate in the microwave or on the stove.
-
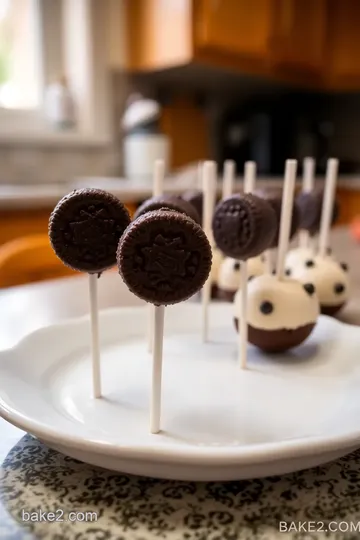
Coat Cake Pops : Dip each chilled cake ball into the melted chocolate, let the excess drip off, and place it on a stand to set.
-
Let It Chill : Pop them back in the fridge for about 10 minutes so the chocolate hardens nicely.
Expert Techniques
Here’s where we get into those professional methods . to achieve a nice and smooth coating, make sure your chocolate isn’t too thick.
If it is, just melt it a bit more until it’s fluid. quality checkpoints? use a thermometer to check that the chocolate is between 90° f and 95° f for the best results.
If you hit a snag, like the coating isn’t sticking, try chilling your cake balls longer—this will help with the DIY cake pops staying intact during the coating process.
Success Strategies
Lastly, let’s chat about common mistakes to avoid . don’t overmix your batter! we want a soft cake interior. and don’t skip chilling; it’s crucial for shaping the pops.
Keep an eye on your chocolate—if it starts to seize, it’s a quick save with just a splash of light oil.
Always double-check your ingredients for freshness. no one likes stale cake pops! and if you want to be fancy, consider some creative cake pop designs with colorful sprinkles or crushed cookies.
These sweet treats are great party dessert options and perfect as snack ideas for gatherings .
What’s stopping you? look into into this quick and easy cake pop adventure! You’ll be able to impress your friends with these delightful homemade cake pops in no time.
And if you need more inspiration, stay tuned for the next section on Additional Information . There’s always more to explore in the world of cookies and cream desserts!
Pro Tips & Secrets
So, you wanna make cookies and cream cake pops in 50 mins , huh? let’s make sure you nail it! here’s the inside scoop from my kitchen adventures.
First off , use room-temperature ingredients. it helps you get that soft cake interior we all adore. and if you wanna save time, pre-crush your cookies while your cake bakes.
Seriously, it cuts down on prep and you get to snack a little!
Now, about flavor. ever tried adding a touch of espresso powder to that cake batter? it’s a total game-changer! flavor enhancement tips like this can take your cake from good to omg delicious .
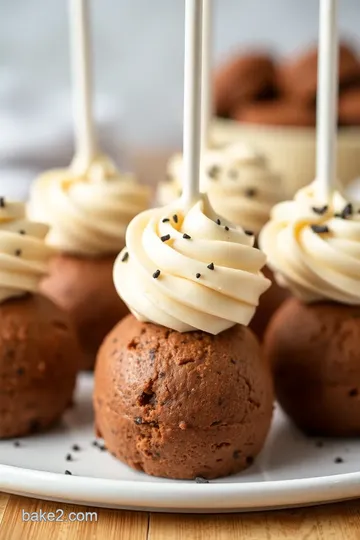
For presentation, think about textures. a sprinkle of extra crushed cookies on top not only looks great but gives that crunchy vibe we love in a cookies and cream dessert .
And, if your chocolate is acting all clumpy, don’t sweat it. just give it a gentle reheat and whisk until smooth.
Perfect Presentation
When it comes to presenting your cake pops, it’s all about visual appeal . use bright colors! think bright sprinkles or even colored candy melts.
You can freakin' create cake pop designs that are seasonal too—like orange and black for halloween. go on, get creative!
Plating techniques ? use a simple piece of parchment paper on a platter and bundle your cake pops together in a cute little bunch.
It makes for an eye-catchin' display! add in some mini chocolate chips or drizzle some melted chocolate on the parchment—suddenly you’ve got party dessert options that wow!
Storage & Make-Ahead
Now, if you can't eat a dozen of these babies in one sitting (though i might challenge you!), let’s talk storage.
Keep those cake pops in an airtight container in the fridge. they’ll stay fresh for about 5-7 days , but i bet they won't last that long!
For making them ahead of time, after you shape the cake pops, freeze them for up to a month before coating.
Just remember to wrap ‘em well so they stay nice and fresh! when you are ready to coat them, pull ‘em from the freezer and coat straight from there to keep that silky chocolate coating .
Creative Variations
Okay, here’s where the fun happens! you can venture beyond the classic cookies and cream flavor. how about a chocolate mint pop? just toss in some peppermint extract into your frosting and use crushed mint cookies.
Calling all mint lovers!
And for those in need of dietary modifications, take note: gluten-free dessert recipes are totally doable! just swap out the all-purpose flour for a gluten-free blend.
You can also create yummy dairy-free dessert options using almond milk and a vegan butter alternative. options are endless.
Complete Nutrition Guide
Before you dive in, let’s chat nutrition. one cake pop is about 200 calories . not too shabby for a sweet treat, right? each pop isn’t just a cozy indulgence; it also packs in some sugar for energy, but of course, these are sweet treats for parties .
So, enjoy them, but remember—everything in moderation!
For those counting macros, they’ve got 2g of protein and 10g of fat, which might not be ideal for a health kick.
But hey, it’s a dessert! just keep those portion guides in mind and treat yourself every now and then.
Expert FAQ Solutions
Now, i know questions pop up. honestly, don't stress if your cake pops don’t look perfect at first. it happens to the best of us! troubleshooting guide : if they crumble when you coat, they might be too warm.
And if your chocolate isn’t sticking, try using a bit of frosting on the pop before dipping.
Plus, if you’re wondering how to coat cake pops properly, it’s all about the dip! quick dips and twirls work wonders.
Just remember, if you have any common questions, google them or ask a buddy who bakes. there’s tons of info out there!
So, what i’m saying is, get your hands dirty and have fun! the kitchen’s the perfect spot to experiment. whip up these delicious cookies and cream cake pops with the tips and tricks provided here and get ready to impress.
You got this! 🥳
Decadent Cookies and Cream Cake Pops Card
⚖️ Ingredients:
- 1 cup (120g) all-purpose flour
- 1 cup (200g) granulated sugar
- 1/2 cup (50g) unsweetened cocoa powder
- 1/2 cup (120ml) whole milk
- 1 large egg
- 1/4 cup (60ml) vegetable oil
- 1 tsp (5g) vanilla extract
- 1 tsp (5g) baking powder
- 1/2 tsp (2g) baking soda
- 1/4 tsp (1g) salt
- 1/2 cup (120g) unsalted butter, softened
- 2 cups (240g) powdered sugar
- 1/4 cup (60ml) heavy cream
- 1 tsp (5g) vanilla extract
- 1/2 cup (50g) crushed chocolate sandwich cookies (e.g., Oreos)
- 12 oz (340g) white chocolate or candy melts
- Sprinkles or additional crushed cookies for decoration (optional)
🥄 Instructions:
- Step 1: Preheat your oven to 350°F (175°C).
- Step 2: In a mixing bowl, combine flour, sugar, cocoa powder, baking powder, baking soda, and salt.
- Step 3: In another bowl, whisk together milk, egg, oil, and vanilla.
- Step 4: Gradually add wet ingredients to dry ingredients and mix until just combined.
- Step 5: Pour the batter into a greased baking dish lined with parchment.
- Step 6: Bake for 20-25 minutes until a toothpick inserted comes out clean.
- Step 7: Let cool completely in the pan.
- Step 8: In a mixing bowl, beat the softened butter until creamy.
- Step 9: Gradually add powdered sugar and heavy cream, beating until smooth.
- Step 10: Add vanilla extract and crushed cookies, mixing to combine.
- Step 11: Once the cake is cool, crumble it into large pieces and transfer to a bowl.
- Step 12: Mix in the frosting until fully incorporated.
- Step 13: Roll the mixture into 1-inch balls and place on a baking sheet.
- Step 14: Insert cake pop sticks into each ball, then refrigerate for 15 minutes.
- Step 15: Melt the white chocolate in a microwave or using a double boiler until smooth.
- Step 16: Dip each cake pop into the melted chocolate, letting excess drip off.
- Step 17: Place on a styrofoam block to harden and decorate with sprinkles or cookie crumbs if desired.
- Step 18: Refrigerate to set for about 10 minutes before serving.
Previous Recipe: How to Bake Delightful Bread Pudding in 1 Hour: My Easy Recipe
Next Recipe: How to Cook Fluffy Strawberry Waffles in 35 Minutes: A Sweet Morning Delight