Delightfully Simple Dairy-Free Rice Krispies Treats
Looking for a quick and scrumptious treat? Make Easy Dairy-Free Rice Krispies Treats in no time! Perfect for parties and school snacks—enjoy the chewy joy!

- Recipe Overview
- Key Benefits
- Ingredients Section
- Essential Ingredients Guide for Dairy-Free Rice Krispies Treats
- Mastering the Art of Professional Cooking
- Pro Tips & Secrets for Making Easy Dairy-Free Rice Krispies Treats
- Perfect Presentation of Your Treats
- Storage & Make-Ahead Tips
- Creative Variations to Try
- Complete Nutrition Guide
- Expert FAQ Solutions
- Time to Get Baking!
- Recipe Card
Oh my gosh, remember those blissful childhood days when every sweet treat felt like a mini celebration? one of my all-time favorites has to be rice krispies treats .
I can still picture my mom's kitchen, the smell of melted marshmallows filling the air. it’s a memory that warms my heart every time i think about it.
But, what about those of us who are dairy-sensitive or simply don’t want to deal with dairy? that’s where i came up with a solution: make easy dairy-free rice krispies treats ! trust me, you’ll love how simple and tasty they are.
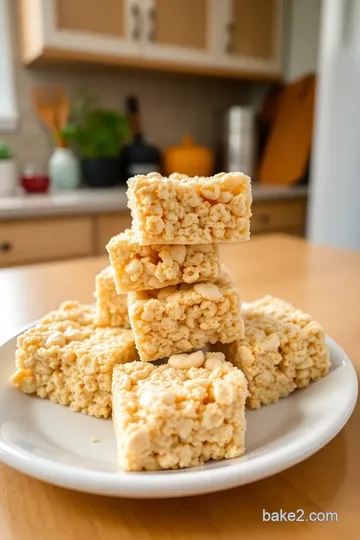
These delicious squares not only bring back sweet nostalgia but also fit modern dietary needs, making them perfect for everyone.
And the best part? you can whip them up in almost no time!
Recipe Overview
Rice krispies treats have been around since the 1930s and were originally crafted using traditional marshmallows and butter. but with the rise of dairy-free dessert recipes , it’s about time we gave this nostalgic treat a modern twist! today, they are more popular than ever, especially with folks looking for kid-friendly dairy-free recipes or simply a quick treat that everyone can enjoy.
This recipe is super easy . like, if you can melt butter, you can do this! you’ll need about 45 minutes total — 10 minutes to whip it up, and about 30 minutes for it to chill.
And guess what? you’ll yield 12 to 16 chewy rice crispy bars . on the cost side, you can make these for under $10, making it a great budget-friendly option for parties or just a sweet craving.
Key Benefits
Now, let’s get into why these are a winner! first off, they offer some great health benefits . using coconut oil for baking not only keeps them dairy-free but also adds healthy fats.
Plus, with gluten-free rice krispies treats , they’re super allergy-friendly!
These goodies aren't just for everyday snacking; they're perfect for celebrations , birthday parties, or school events where you want to impress with your baking prowess without worrying about allergies.
Trust me; you can customize those fun rice krispie treat toppings to fit any theme, and everyone will rave about them!
Another big advantage? they’re quick. seriously, who doesn’t love a recipe that requires no baking? with these easy no-bake desserts , you can throw together a batch at a moment’s notice.
Plus, they beat many other store-bought snacks with their simple ingredients and customizable options. want a chocolate kick? toss in some dairy-free chocolate chips! feeling adventurous? you can mix in nuts for a little crunch.
So, are you ready to dive into the world of simple, delightful dairy-free sweets for celebrations ? Let's check out the ingredients you'll need to get started!
Ingredients Section
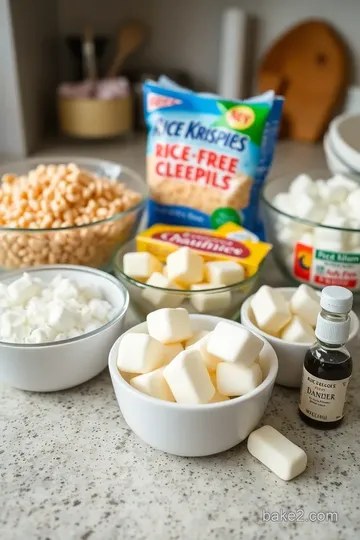
For our Delightfully Simple Dairy-Free Rice Krispies Treats , here’s what you’ll need to gather:
For the Treats:
- 3 tablespoons of dairy-free butter substitute (coconut oil or vegan butter works great!)
- 1 package (10 oz or 285 g) of dairy-free marshmallows
- 6 cups (150 g) of crispy rice cereal (just double-check it’s dairy-free)
- 1 teaspoon of vanilla extract (totally optional but adds a nice touch!)
For Optional Topping:
- 1/2 cup of dairy-free chocolate chips
- 1/4 cup of colorful sprinkles for those festive vibes
Equipment:
- A large saucepan
- Measuring cups and spoons
- A silicone spatula for mixing
- A 9x13-inch baking dish
Now, you can totally see how easy this is! Let’s toast to fun memories and delicious dairy-free treats! Keep your kitchen handy; you’ll be making these before you know it!
Essential Ingredients Guide for Dairy-Free Rice Krispies Treats
So, you want to dive into making some easy dairy-free rice krispies treats ? awesome choice! but before we roll our sleeves up, let’s chat about some essential ingredients that’ll help you create these delightful snacks.
Trust me; knowing your ingredients is half the battle (and the fun!) of cooking.
Premium Core Components
Let’s start with the basics. When making any dessert, quality matters . So, here’s a breakdown of what you’ll need for those crispy, chewy bars.
-
Dairy-free butter substitute : you can go for 3 tablespoons (42 g) of coconut oil or vegan butter. both work beautifully, giving that rich taste.
Make sure it’s a high-quality brand. look for a creamy texture and a clean coconut smell if you're choosing coconut oil.
-
Dairy-free marshmallows : grab a 10 oz (285 g) pack of your favorite brand—like dandies. these will be your sticky, sweet hero! check for a soft feel and a glossy appearance.
If they seem hard, leave them on the shelf!
-
Crispy Rice Cereal : You’ll need 6 cups (150 g) . Make sure it’s labeled dairy-free . Look at the ingredients list—if it’s simple with no weird additives, you’re golden.
Storage Guidelines? Keep your butter in a cool, dark cupboard and your marshmallows in a dry place. They should last a while – think a few months!
Signature Seasoning Blend
Now, let’s spice things up! Well, maybe not in the traditional sense, but your treats can have personality too.
-
Vanilla Extract : A teaspoon adds depth. It’s like a hug in flavor form. Plus, it keeps things aromatic. Don’t skip it!
-
Optional Add-Ins : Want some crunch? Toss in some nuts or dried fruits. Or maybe some colorful sprinkles for that fun factor!
Smart Substitutions
So, life happens, and sometimes you don't have everything on hand. No worries! Here are some smart substitutions .
-
Marshmallows : If you don’t have dairy-free marshmallows, mix 1/4 cup agave syrup with 1 tablespoon chia seeds soaked. Works like a charm!
-
Crispy Rice Cereal : Need gluten-free options? Some brands offer gluten-free alternatives. Just read that label!
-
Butter Substitute : In a pinch, coconut oil can replace dairy-free butter. It gives a slight coconut flavor, which is delightful!
Kitchen Equipment Essentials
Before you jump in, make sure you have the right gear:
-
Large Saucepan : You’ll need this for melting.
-
Silicone Spatula : Perfect for mixing without scratching your pots. Score!
-
Baking Dish : A 9x13-inch will do the trick. Optional parchment paper will save you some mess!
Closing Thoughts Before We Start
And there you have it! With these essentials, you'll be ready to whip up some deliciously simple, chewy rice crispy bars .
Now, if you’re ready to impress your friends or whip up a treat for the kiddos, let’s jump into the instructions.
Making these easy dairy-free rice krispies treats is just a few steps away! get excited because these treats are not just dairy-free dessert recipes ; they're perfect for parties, school snacks, or just a little indulgence.
You’ve got this!
Mastering the Art of Professional Cooking
Okay, so if we’re going to talk about professional cooking, let’s break it down simple, right? the truth is, cooking is a lot like riding a bike—once you get the hang of it, it’s a blast! but, like any pro out there, you gotta start with the basics, and that’s where the essential preparation steps come into play.
Essential Preparation Steps
First thing’s first— mise en place . this french term just means “everything in its place.” sounds fancy, huh? well, it’s key.
Before you start cooking, get all your ingredients measured and organized. think of it as laying out your building blocks before diving into the lego castle.
You don’t want to be scrambling for a cup of sugar while your butter’s burning!
Next, let’s chat about time management tips . trust me, you won’t want to be dragging your feet during dinner prep.
Try setting a timer for each step. it feels great to say “boom!” when the timer goes off, and that way, you won’t be twiddling your thumbs when you should be whisking.
Now, there’s organization strategies —a fancy way of saying, “keep your kitchen tidy!” clean as you go. grab a bowl for scraps and toss in any peels or bits you don’t need.
This way, you won’t have a mountain of dishes when you finish cooking. and let’s not forget about safety considerations —always use knives safely, and if you’re frying or grilling, keep a fire extinguisher nearby.
Better safe than sorry, my friend!
Step-by-Step Process
Alright, now let's get into the nitty-gritty with step-by-step instructions . Here’s a little cheat sheet:
- Heat your pan to a medium-high temperature .
- Add oil when it’s hot—how hot? If it shimmers, it’s ready!
- Get your food in the pan but don’t overcrowd it, or you’ll end up steaming rather than browning. Let each piece have its moment!
Timing is everything in cooking—like, seriously. try using a food thermometer for meat; it should reach 165° f for chicken and about 145° f for fish.
And look for visual cues like that golden brown on your bread or a bubbling sauce. it’ll tell you when it’s just right.
Expert Techniques
Let’s level up. to be a real kitchen ninja, know some professional methods . ever heard of blanching? that’s when you briefly boil veggies to preserve color and crunch—perfect for a bright salad.
When it comes to cooking meat, remember those critical steps : let it rest after cooking! that ensures all those juicy flavors stay locked in.
Check for quality at every stage. if something looks funky, toss it! life’s too short for bad food.
If you mess up, don’t panic! use some troubleshooting tips . overcooked pasta? toss it in cold water to stop the cooking.
Lumpy sauce? whisk it vigorously or blend it smooth. you’ve got this!
Success Strategies
Now, let’s get real about common mistakes to avoid —like forgetting to season food. seriously, a pinch of salt will wake those flavors up.
Lack of prep can lead to chaos, so stick to your mise en place.
As you try out new dishes, you’ll need quality assurance tips . taste as you go! don’t wait until the end to find out if it’s bland.
Another useful hack? keep things flexible with make-ahead options . many dishes can sit overnight to develop even better flavors!
Speaking of simple delights, if you want a quick win in the kitchen, learn to make easy dairy-free rice krispies treats .
It's such an effortless dessert! just melt some dairy-free butter substitute and marshmallows, then stir in crispy rice cereal. so easy, anyone can do it! perfect for parties or just satisfying that sweet tooth.
So the next time you get the cooking bug, remember these tips and tricks. cooking's all about having fun! and if you want to dive into more ideas, hang tight for the last section.
There’s always something new to learn when it comes to food. happy cooking!
Pro Tips & Secrets for Making Easy Dairy-Free Rice Krispies Treats
Oh my gosh, if you're diving into the world of easy dairy-free rice krispies treats , you're in for such a treat! these cozy bars are a breeze to whip up, but let me share some pro tips and secrets to get them just right.
First, make sure to go with dairy-free butter substitutes like coconut oil or vegan butter. trust me, it makes all the difference in taste! when you’re melting your butter, do it on low heat.
This keeps you from turning it into a sticky mess! i learned that the hard way—burnt marshmallows are a travesty, people.
Now, if you want to jazz up that flavor, try adding a splash of vanilla extract . just a teaspoon amps up the taste.
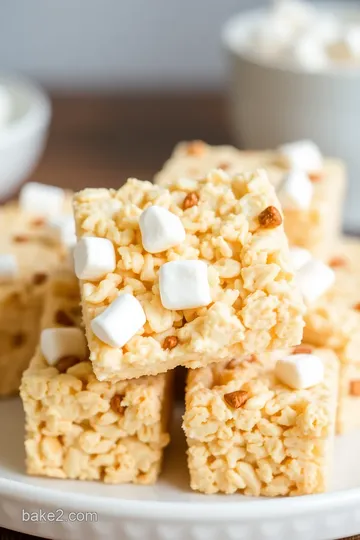
And while we’re at it, think about mixing in some dairy-free chocolate chips or colorful sprinkles as a topping. it’s all about that flair, right?
Perfect Presentation of Your Treats
Now, let’s talk presentation. you know how they say we eat with our eyes first? a plate of dairy-free snacks looks ten times better with the right plating techniques.
Use a sharp knife to make those clean cuts. i love laying my squares out on a pretty platter with some parchment paper—it just looks fancier!
Garnish with some fresh fruits or even drizzle some melted dairy-free chocolate on top. the color combinations can really bring it alive! bright sprinkles or edible glitter can turn your rice krispie bars into real party treats without dairy.
Storage & Make-Ahead Tips
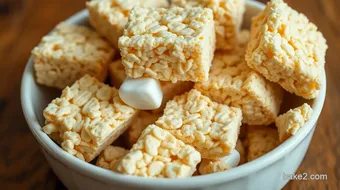
So, you made a big batch of these charming chewy rice crispy bars —now what? the good news is they can last a bit! store them in an airtight container at room temperature, and they’ll be fresh for about a week.
Honestly, i’ve kept mine for up to 10 days, but they’re usually gone way before that!
If you want to make them ahead, you totally can! just follow the recipe, and once they’re set, wrap them tightly in plastic wrap.
Toss them in the fridge if you know you won’t eat them for a couple of days.
Reheating? Well, there’s no baking involved, so just grab one and go!
Creative Variations to Try
Feeling a little adventurous? there’s a world of dairy-free dessert recipes out there waiting for you! mix things up by experimenting with flavors.
Pump up the fun with some s'mores style by adding graham cracker crumbs and mini chocolate chips.
For seasonal flavors, think pumpkin spice in the fall! or go berry-flavored in summer by mixing in dried fruits. customize them to fit every holiday or birthday party with ease.
Just remember —whatever you add, keep in mind it should be dairy-free.
Complete Nutrition Guide
And here’s a cherry on top: for those who are counting or curious, a serving (about one square) has around 150 calories.
These healthy rice crispy treats also have a bit of sugar, which is what gives them that sweet kick! so, if you're like me and have friends who are on special diets, these treats fit the bill without any worries—just make sure to check the labels.
Expert FAQ Solutions
You might be asking: What’s the difference if I don’t use dairy-free marshmallows? Well, if you’re in a pinch, you can get creative! Swap them with 1/4 cup agave syrup mixed with chia seeds for that marshmallowy texture!
If your treats turn out too sticky, try pressing them with wet hands. It’s a bit of a game changer, trust me!
Time to Get Baking!
So, there you have it—a whirlwind tour through the world of easy dairy-free rice krispies treats ! whether you’re a newbie just trying your hand at it or a pro wanting to jazz things up, these tips should set you on the right path.
You’ll have the perfect snacking solution for parties or a simple, sweet fix for you and your family.
Enjoy your baking adventure, and remember, it’s all about having fun in the kitchen! Happy cooking!
Delightfully Simple Dairy-Free Rice Krispies Treats Card
⚖️ Ingredients:
- 3 tablespoons dairy-free butter substitute (e.g., coconut oil or vegan butter)
- 1 package (10 oz) dairy-free marshmallows (e.g., Dandies or similar)
- 6 cups crispy rice cereal (ensure it
- s dairy-free)
- 1 teaspoon vanilla extract (optional)
- 1/2 cup dairy-free chocolate chips (optional)
- 1/4 cup colorful sprinkles (optional)
🥄 Instructions:
- Step 1: Make Easy Dairy-Free Rice Krispies Treats.
Previous Recipe: How to Identify Flour with Easy Water Test: 5 Secrets for Perfect Baking
Next Recipe: Easy Bake Crab Brûlée: A Delicious Savory Treat for Gatherings