Make Homemade Cake Flour: Quick & Simple
Have you ever wondered how to make homemade cake flour? It's quick and simple with just two ingredients. Perfect for light, fluffy cakes every time!

Oh my gosh, have you ever baked a cake that just didn’t come out right? i mean, we’ve all been there, right? you follow every step, you measure, you pour, and then it’s like… wham! your cake looks more like a dense brick than a fluffy treat.
Trust me, i’ve had my share of baking fails. that’s why i’m super excited to show you how to make homemade cake flour: quick & simple .
Seriously, it’s a game changer! this diy cake flour recipe will have you baking light and fluffy cakes that are the envy of your family and friends.
If you haven’t tried making your own cake flour yet, you’re definitely missing out! this technique relies on just two super common kitchen ingredients: all-purpose flour and cornstarch.
Not only will your cakes have that coveted fine crumb —but you’ll also save a few bucks. let’s dive in!
Recipe Overview
Now, you might be wondering how on earth homemade cake flour became a popular choice for bakers. it’s pretty simple.
Cake flour has a lower protein content than regular flour, which is why it gives cakes that delicate, tender texture .
Historically, cake flour originated when bakers needed a flour that wouldn't weigh down their concoctions. these days, many folks opt for it because they want a cake that doesn’t resemble a doorstop.
This homemade cake flour recipe takes a mere 5 minutes to whip up. and, guess what? it’s real easy, like a walk in the park! with just a cup of cake flour produced from this method, you’ve got enough for most standard cake recipes—perfect for your next birthday cake or even a wedding cake.
And let’s talk cost. you’re probably wondering if this homemade version is going to break the bank. nah! you can grab a bag of all-purpose flour and a box of cornstarch for a fraction of what you’d pay for specialty flour.
Plus, you can use both ingredients in other recipes, making them a true all-purpose flour alternative.
Key Benefits
Now, while cake flour is a must for that light and fluffy cake texture, it’s also got some serious health benefits.
By making your own, you control the ingredients. want to make it gluten-free? no problem! just swap out your all-purpose flour for a gluten-free blend.
Seriously, this is a solid gluten-free cake flour recipe that everyone can enjoy.
Let’s not forget occasions to serve it! birthdays, weddings, or even a simple weekend brunch just scream for a homemade cake.
Plus, you get an edge over store-bought options. not only will your cakes be fresher, but you’ll also impress everyone with your diy skills, all while saving some bucks to boot!
And here’s a little baking tip from yours truly: sifting flour is key . you want to aerate cake flour properly, making sure that air gets in to create those light cakes everyone loves.
It’s a small step that makes a massive difference.
So, ready to roll up your sleeves and get baking? let's move on to the ingredients you'll need to whip up this magical homemade cake flour.
It’s a simple list, and i’m sure you already have most of the stuff in your pantry!
Essential Ingredients Guide: Bake Like a Pro!
So, you've decided to jump into the world of baking, huh? that's awesome! let's make sure you have all the good stuff on hand.
The right ingredients really set the foundation for great cakes, cookies, and everything in between. this essential ingredients guide will give you the lowdown on what you need and how to use it.
Premium Core Components
First up, let’s talk about quality ingredients . if you want light and fluffy cake flour or a moist cake, pay attention to detailed measurements .
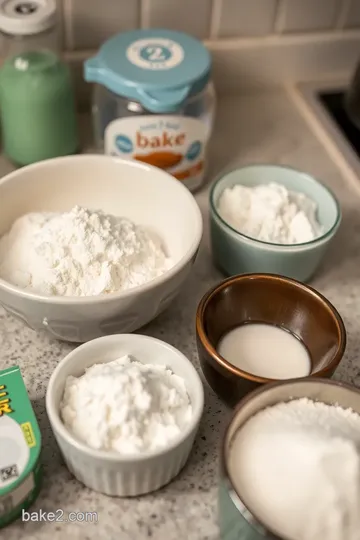
For your homemade cake flour, grab 1 cup (that's 120g ) of all-purpose flour and 2 tablespoons (or 15g ) of cornstarch.
This combo is a lifesaver! when measuring, use dry measuring cups for accuracy.
Quality indicators matter too. look for flour that is fresh and unbleached . freshness is key to great flavor. store it in a cool, dry place, preferably in an airtight container—no one likes a flour bug! the shelf life varies, but generally, expect about 6-12 months for all-purpose flour.
For freshness tips, trust your nose! If it smells off, toss it. Quality ingredients can mean the difference between a dry cake and one that makes you swoon.
Signature Seasoning Blend
Seasoning can transform your cakes from "meh" to "oh my gosh!" you’ll want to learn some essential spice combinations as you bake.
For example, vanilla extract and a pinch of salt can elevate even the simplest cake.
When it comes to herbs and spices , think about pairing! you can add a bit of cinnamon for warmth or some zest from a lemon for brightness.
Don't skip the aromatics ; they can enhance flavors immensely!
Oh, and regional variations—like adding almond extract for a nod to Italian baking—can bring some unique flair to your desserts. It’s delicious!
Smart Substitutions
We're all human, and sometimes we don’t have every ingredient on hand. no sweat! let’s dive into common alternatives . for example, if you lack cornstarch, you could reach for arrowroot flour .
It works wonders too. craving a gluten-free cake flour recipe? combine a gluten-free flour blend with the cornstarch, and you’re all set!
Emergency replacements are lifesavers. If you're in the middle of your cake, and whoops!—out of sugar? Try using maple syrup instead, just reduce other liquid ingredients slightly.
Seasonal options also add fun to your baking dreams. Use pumpkin spice in fall or fresh berries in summer. Delicious, right?
Kitchen Equipment Essentials
Now, let’s discuss what tools you’ll need. must-have tools for bakers include measuring cups, spoons, a mixing bowl, and a sifter .
Trust me, a good sifter is your best bud for creating that light and fluffy cake flour . whisking flour well is also vital for cake consistency .
If you can’t afford high-end gadgets, no worries! a regular old fork or even a spoon can work in a pinch.
Just remember to schedule enough time for prep and your desserts will shine.
Lastly, proper storage solutions for your homemade flour are essential. Keep it airtight, so it stays fresh for your next baking adventure.
So, whether you’re planning your next birthday cake or looking for easy dessert preparation time , this guide will help. You’re on your way to becoming a baking superstar!
Now that you're equipped with the essentials, it’s time to roll up those sleeves and get baking! don't forget the star of the show: make homemade cake flour: quick & simple ! let's dive into those step-by-step instructions.
.. because who doesn't love a slice of cake warm from the oven?
Mastering the Art of Professional Cooking: Your Essential Guide
Hey there! so, you wanna step up your kitchen game, huh? whether you’re whipping up a birthday cake or just trying to impress your friends with your cooking skills, mastering professional cooking methods is the way to go.
Let’s break it down into easy bits, yeah?
Essential Preparation Steps
First off, let’s chat about mise en place . sounds fancy, right? but it just means getting your ingredients ready before you start cooking.
Chop, measure, and have everything in arm’s reach. it’ll save you loads of time—and trust me, chaos in the kitchen is no fun.
Oh, and speaking of time— management is key! Use a timer. It’ll keep your mind from wandering when you’ve got something simmering on the stove. You don’t wanna burn your dinner!
When it comes to organization , create a clean workspace. it keeps you focused and makes your cooking experience way less stressful.
And a quick note on safety: always keep a towel handy, and make sure your workspace doesn’t become a slip-and-slide.
Step-by-Step Process
Now, let’s get down to the nitty-gritty.
-
Measure your ingredients. Precision matters! If a recipe calls for 375° F , make sure your oven is right on the mark.
-
Prep your tools. For heat-sensitive stuff, like chocolate, know when to lower the temperature. Too hot, and you might end up with a burnt mess!
-
Pay attention to timing. Use a stopwatch when cooking proteins. Timing is crucial—nobody likes rubbery chicken!
-
Look for visual cues. Is your cake puffed up and golden brown? That’s a good sign it’s done!
Expert Techniques
Okay, let’s get serious for a second. professional cooking isn’t just about following a recipe; it’s about mastering critical techniques.
For example, knowing how to sift flour properly can make a world of difference in fluffiness. it's all about that light and fluffy cake flour texture.
You’ll also want to create those quality checkpoints throughout your cooking. does your sauce taste balanced? is your cake rising nicely? and if things go sideways? don’t sweat it! a splash of vinegar or a sprinkle of sugar can sometimes save the day.
Success Strategies
Now, let’s save you from common pitfalls. one biggie? overmixing your batter. seriously, it can lead to dense cakes. no one wants that! also, check your ingredients—using expired baking soda might result in sad, flat cakes.
Got everything ready? Awesome! Keep a quality assurance checklist maybe. Tasty cakes should bounce back a little when gently pressed. If not, it might need a few more minutes!
Want to prep ahead? think about make-ahead options . you can whip up that homemade cake flour a couple of days in advance.
Just remember to check out my quick and simple recipe for that— make homemade cake flour: quick & simple . you’ll be baking those light, airy desserts in no time!
Additional Information
So that’s it, folks! you’ve got the lowdown on professional cooking methods and all the nitty-gritty details to nail your baking game.
Honestly, once you’ve got these steps down, you’ll feel like a kitchen rockstar. remember, cooking is just as much about confidence—so have fun with it!
And hey, don’t forget to explore baking with homemade flour and all those other tips and tricks we’ve chatted about.
Elevate your baking from sweet dessert recipes to those special wedding cakes that blow everyone away.
Happy cooking! You got this!
Additional Recipe Information
Pro Tips & Secrets
Alright, let's dive into some insider tips ! one of my favorite things to share when making your own flour is to sift it well .
Seriously, sifting isn’t just a step; it’s a game-changer. not only does it help aerate the flour, making sure that light and fluffy cake vibes hit just right, but you also get rid of any little lumps that might sneak in.
Just this one technique can pretty much make or break your cake consistency !
Also, if you’re in a hurry, combine your ingredients and then sift them over a bowl. This little time-saving trick will speed things up but still delivers that fabulous texture.
Perfect Presentation
Okay, so you’ve baked your cake and transferred it to a serving platter. now it’s time to make it pretty ! plating can actually be really fun.
Consider using a cake stand to give your masterpiece that “wow” factor. if you’re feeling fancy, drape it with a little classic buttercream frosting and add some colorful sprinkles.
It’s all about making those colors pop!
And speaking of colors, think about serving the cake with something bright, like a side of fresh fruit salad . not only does it look gorgeous, but the sweetness of the fruit complements your cake perfectly.
Storage & Make-Ahead
Let’s keep it real: sometimes life gets busy, and you wanna be prepared. this homemade cake flour can be made in advance! just store it in an airtight container kept in a cool, dark place.
It should stay fresh for about a month, so no need to panic.
When it’s time to use it, one thing to remember is to re-sift before baking. this helps get back that fluffy texture! if you’ve got leftover cake, just wrap it up in plastic wrap and pop it in the fridge.
It’ll be good for about 3 days. remember, nobody likes a dry cake!
Creative Variations
Feeling adventurous? there are endless ways to adapt this recipe to your liking! for a gluten-free cake flour recipe , swap the all-purpose flour for a gluten-free blend and use the same cornstarch trick.
If you’re more into self-rising cake flour , toss some baking powder and salt into the mix to give it a little extra lift.
Seasons change, and so can your flavors! add in some pumpkin spice in the fall or go tropical with some coconut or pineapple in the summer.
The world is your oyster, my friend!
Complete Nutrition Guide
Now let’s talk nutrition. you might be curious about what you’re actually whipping up. a serving of homemade cake flour comes in around 455 calories and 10g of protein.
It’s basically just a deliciously sweet canvas awaiting your creativity.
Using homemade flour gets you away from preservatives found in some store-bought alternatives. You're baking with real ingredients , making your sweet treats a tad healthier—score!
Expert FAQ Solutions
Baking can be intimidating, right? but don’t sweat it; we’ve all been there! the number one question i often see is, “what if my cake doesn’t rise?” well, check the freshness of your baking powder or add a pinch more cornstarch to aerate your homemade cake flour.
When in doubt, just remember that practice makes perfect, so don’t be scared to try again.
And if your cake seems too dense? That’s a sign you need to incorporate more air while mixing. So whip that batter with passion!
Wrapping Up
So there you have it—the ultimate guide to make homemade cake flour: quick & simple . with just a couple of ingredients, you’re on your way to creating cakes that’ll impress everyone at your next gathering.
Just remember, baking is all about enjoying the process. don’t stress too much—enjoy every slice and share the love. you’ve got this!
Make Homemade Cake Flour: Quick & Simple Card
⚖️ Ingredients:
- 1 cup (120g) all-purpose flour
- 2 tablespoons (15g) cornstarch
🥄 Instructions:
- Step 1: Use a measuring cup to measure 1 cup of all-purpose flour.
- Step 2: Measure out 2 tablespoons of cornstarch.
- Step 3: In a mixing bowl, add the all-purpose flour and cornstarch together.
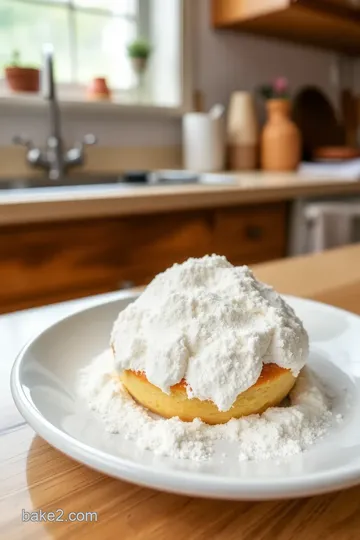
- Step 4: Use a sifter or a fine-mesh strainer to sift the flour and cornstarch mixture into a clean bowl. Repeat the sifting process 2-3 times.
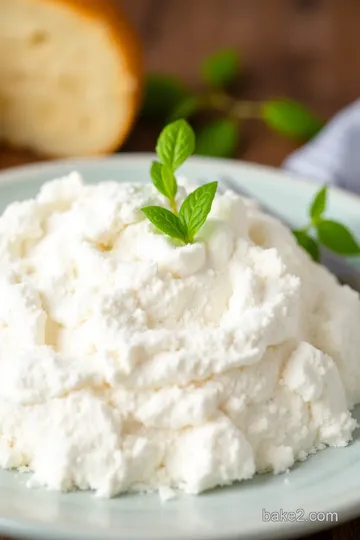
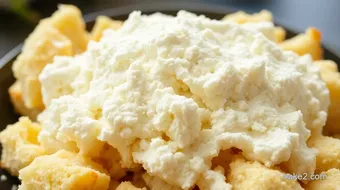
- Step 5: The final mixture should be light and fine, similar to store-bought cake flour.
- Step 6: If not using right away, transfer to an airtight container for storage.
Previous Recipe: How to Bake Summer Fruit Crumble Cake - A Delightful Treat
Next Recipe: How to Mix Gluten Free Flour for Light Cakes: My Grandma's Secret!