Quick Flaky Pastry Dough for Tasty Pies
Looking for the best way to make Quick Flaky Pastry Dough for Tasty Pies? This easy recipe guarantees a perfectly flaky crust every time! You're going to love it!

- Introduction to Quick Flaky Pastry Dough for Tasty Pies
- Essential Ingredients Guide for Your Next Pie Adventure
- Mastering the Art of Pie-Making: Your Go-To Guide
- Pro Tips & Secrets to Perfect Your Quick Flaky Pastry Dough for Tasty Pies
- Perfect Presentation: Make Your Pie Shine
- Storage & Make-Ahead: Keep It Fresh
- Creative Variations: Mix It Up
- Complete Nutrition Guide: Know What’s in Your Pie
- Expert FAQ Solutions
- Wrap-Up: Get Baking!
- Recipe Card
Introduction to Quick Flaky Pastry Dough for Tasty Pies
Have you ever bitten into a pie and experienced that perfect flaky crust, just bursting with flavor? i remember the first pie i ever made; i was so pumped! i thought, "how hard can it be?" but let me tell ya, getting that flaky pastry dough just right was a real lesson in patience.
It was a total game-changer when i finally nailed it. this brings us to today’s star— quick flaky pastry dough for tasty pies.
Trust me; this recipe is as close to magic as you can get in the kitchen.
With just a handful of ingredients and a little chill time, you’ll create dough that takes your sweet and savory fillings to a whole new level.
Honestly, once you get the hang of this, making a homemade pie crust will be a breeze, and you'll feel like a pro in your own kitchen!
Recipe Overview: A Slice of History
This dough isn't just a modern-day phenomenon; it has roots that go way back to classic french pastry techniques. historically, pastry making was reserved for the elite, which is probably why it seems so fancy! thankfully, we’ve come a long way, and today, quick flaky pastry dough is approachable for anyone wanting to bake pies at home.
People love this recipe for its versatility! whether you’re craving a fruit pie or a cozy cottage pie , this dough holds up for all kinds of delicious fillings.
The best part? it’s labeled easy for a reason; even beginners can whip up a flaky pastry dough without breaking a sweat.
Plus, it takes about an hour and a half from start to finish, including chilling time. seriously, less than your favorite rom-com duration!
Key Benefits: Why You Need This Dough
Okay, let’s break it down. Why should you bother making Quick Flaky Pastry Dough ?
-
Health Benefits: This dough is made with all-purpose flour, which is more nutritious than store-bought options packed with preservatives. Plus, it uses unsalted butter, so you can control the salt count.
-
Unique Flavor: The buttery richness of this dough is a game-changer. It elevates both sweet and savory pies, giving you that mouthwatering experience every time.
-
Versatile Use: From easy pie crust recipes to fancy dessert pie recipes , it covers the spectrum. Whether it's a family gathering or a cozy night in, this dough fits right in.
-
Perfect for Any Occasion: Got a birthday? Host a party? Or just wanna impress your friends on Taco Tuesday with a savory pie? This dough is your secret weapon.
-
Advantages over others: unlike commercial pie crusts, which can be bland or dry, making your own gives you complete control of texture and flavor.
And let’s be real, nothing beats the smell of fresh pie baking at home!
Transitioning into emptying the fridge feels so satisfying. think about all the cool variations you can try with fillings, from classic fruit mixes to creative combinations of veggies and meats.
By now, i'm sure you're feeling pumped, right? let’s dive into the ingredients you’ll need for this delicious journey into pie-making!
Get ready to roll up those sleeves, sharpen that rolling pin, and unleash your inner pie chef. This is going to be so much fun!
Essential Ingredients Guide for Your Next Pie Adventure
Alright, my friends, let's dive into the wonderful world of pie-making! we're talking about that quick flaky pastry dough for tasty pies that makes your dessert shine like a star.
Now, before we get too far into the deliciousness, let’s break down some essential ingredients and tips that’ll make you a pie-making pro.
Premium Core Components
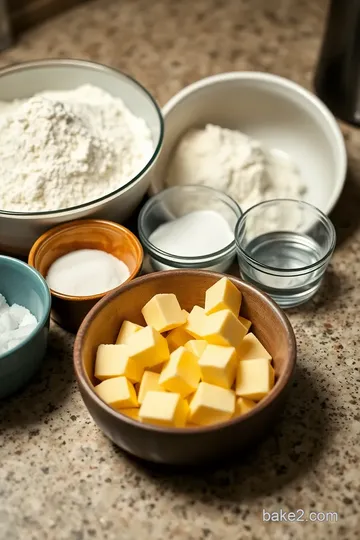
First off, let’s chat about measurement . whether you're using us or metric , it's crucial to be precise. for instance, you’ll need 2 ½ cups (320g) of all-purpose flour.
This is your base, the backbone of your dough. and if you’re trying to be all fancy with it, try to source high-quality flour.
You know, the stuff that makes your pie crust the talk of the neighborhood.
When picking ingredients, keep an eye out for quality indicators . fresh herbs should be vibrant and aromatic, and your butter? it should be cold and well, buttery! trust me, nobody wants soggy or bland pie fillings.
If you're not sure how to store, butter lasts about six months in the freezer , and flour can hang around for about one year if sealed tight in a cool, dry place.
While we're on freshness, here’s a little tip: always give herbs a sniff! if they smell like cardboard, they’re probably past their prime.
Pick fresh, vibrant produce for your fillings. your pies will thank you later!
Signature Seasoning Blend
Now, let’s sprinkle in some magic with our signature seasoning blend . a touch of salt enhances almost any flavor. if you’re going sweet, just a tablespoon of sugar mixed into the crust can do wonders! for savory pies, consider adding a pinch of thyme or rosemary for that gourmet touch.
Trust me, it’s a game changer!
And let’s not forget about regional variations . think of spicing things up with some local flair—like using cilantro in a southwest chicken pie or a hint of cinnamon in your apple filling to keep things interesting.
Smart Substitutions
Life happens, right? so, let’s talk about smart substitutions . if you're out of butter , you can always swap it for vegetable shortening or even coconut oil for a vegan touch.
Noted from experience, this can be a lifesaver!
And if you’re looking to adjust for dietary needs, for example, cutting down on gluten, look for gluten-free flour blends .
They work great, though be aware that the texture might differ slightly.
Say you’re deep in pie-making mode and suddenly realize you forgot to buy an ingredient. no worries—just think of emergency replacements .
Running low on sugar? honey can bring a lovely sweetness to your crust or filling. it’s all about creativity in the kitchen, folks!
Kitchen Equipment Essentials
Okay, let’s get real about what tools you need. must-have kitchen equipment includes a good mixing bowl , a rolling pin , and a pastry cutter or fork to be the best pie maker you can be.
A decent pie dish (i’m all about the glass ones!) allows you to see that beautiful crust as it bakes.
Not crucial but definitely nice are cooling racks to let your pie sit after baking—nothing worse than a soggy bottom! Use parchment paper for pre-baking your pie to avoid sticking.
And pressing pause for a second— chilling that pastry dough? it's like giving your dough a mini-vacation! it helps the butter firm up and makes for a buttery dough that doesn't shrink (hey, we've all been there!).
So, there you have it! with this essential ingredients guide , you’re set to make the best quick flaky pastry dough for tasty pies while feeling confident! trust me, the journey to homemade pie perfection is all about relaxing and enjoying the process.
Next up, we’ll jump right into the clearer instructions so you can whip up that pie crust faster than you can say "let’s eat!" trust me, the pie of your dreams is just a few steps away.
Mastering the Art of Pie-Making: Your Go-To Guide
Hey there, pie lovers! if you’re itching to dive into pie-making but feel a little lost, don't sweat it! let’s break down professional cooking methods that make creating a quick flaky pastry dough for tasty pies not only achievable but fun.
Seriously, if i can do it, you can too!
Essential Preparation Steps
Before we even think about rolling out dough, we gotta get our ducks in a row.
Mise en Place
First things first, mise en place —that fancy culinary term for having everything ready. measure out your 2 ½ cups of all-purpose flour and a cup of cold butter .
Having it all set saves you from scrambling later.
Time Management Tips
Set a timer. It’s your best friend in the kitchen. For the best crust, you'll want to chill that dough for 30 minutes . Trust me; it’s worth every second.
Organization Strategies
Keep your workspace clean. i can’t emphasize this enough. a clutter-free zone makes a happy chef. use bowls for dry ingredients and a separate one for wet—not all mixed up in a heap.
Safety Considerations
Remember, knives and hot ovens can be tricky. Watch your fingers and don’t forget the oven mitts when pulling out that beautiful pie!
Step-by-Step Process
-
Start with Dry Ingredients : Whisk together flour , salt , and sugar in a bowl.
-
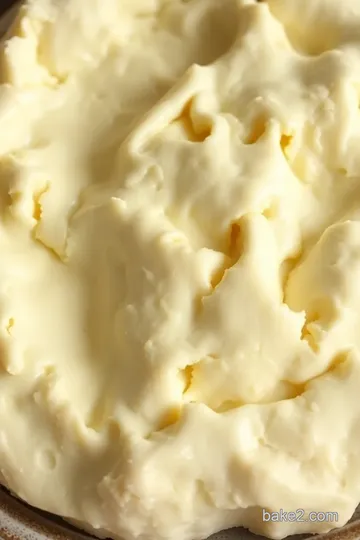
Mix in Butter : Add in that cold, cubed butter and blend until you get that coarse crumb look. Think pebble-sized butter pieces.
-
Ice Water Time : Gradually add ice water , about 6-8 tablespoons , until it starts to come together. Gentle mixing only; we want it light!
-
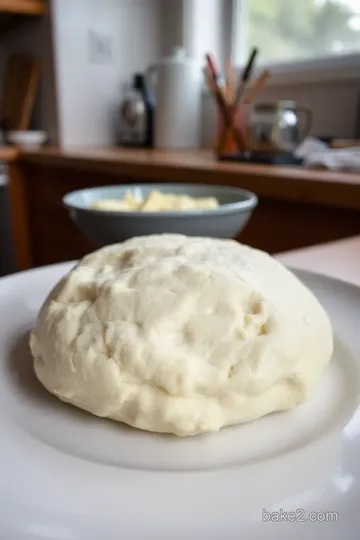
Shape It Up : Transfer to a floured surface, form a ball, and knead just a touch. Overworking is a no-no!
-
Chill : Wrap it up and toss it in the fridge. This is crucial! It helps prevent dough shrinkage, which is the bane of beautiful pies.
-
Roll It Out : After it’s cooled, roll to about 1/8-inch thick . Fit it into your pie dish and trim the excess.
-
Pre-Bake If Needed : For a pre-baked crust, layer it with parchment and weights, then bake at 375° F ( 190° C) for 15 minutes .
-
Fill and Bake : Add your favorite filling and bake according to your recipe's directions until golden brown.
Expert Techniques
Now, if you want to step up your pie game, allow me to share some expert techniques.
Critical Steps Explained
Always keep your butter cold. It’s key to that flaky texture. Make sure not to let your ingredients sit out; they should be ice-cold, like the butter itself.
Quality Checkpoints
After you roll out your dough, check for tears or overly thick areas. This isn't a rustic bread; we want it to be smooth and even.
Troubleshooting Tips
If your crust cracks while rolling, don’t panic! Just pat it back together with your fingers and roll gently.
Success Strategies
Let’s talk about winning here—how to nail that pie every time.
Common Mistakes to Avoid
One major mistake? Using room-temperature butter. That’s a recipe for disaster! Keep it cold!
Quality Assurance Tips
Taste the filling before you pour it in! Sweeten it up or add a little citrus for zest. A delicious filling can elevate even the simplest crust.
Perfect Results Guide
For that perfect pie crust, it really is about chilling your dough . It’s not just a step; it’s essential.
Make-Ahead Options
Good news! You can make this dough a day or two in advance. Just wrap it up tight in plastic and stash it in the fridge. Easy-peasy!
So there you have it—your guide to mastering the quick flaky pastry dough for tasty pies ! whether you're embarking on sweet or savory pie adventures, i promise this dough will serve you beautifully.
Keep these tips in mind, and you’ll be serving up warm, flakey goodness with confidence.
And before I sign off, let’s transition to a little more juicy info... stay tuned for additional information that can keep your pie-making game strong!
Pro Tips & Secrets to Perfect Your Quick Flaky Pastry Dough for Tasty Pies
So, you’re diving into the world of quick flaky pastry dough for tasty pies ? awesome choice! let me share some pro tips i’ve picked up along the way.
These insights are gonna make your pie crust game strong, trust me!
First off, keeping everything cold is key . seriously. cold butter = flaky pastry dough. use that cold butter pastry method and you’ll see the magic happen.
Don’t be shy with the ice water, either! it’s not just for drinking; it’s part of that ice water dough technique that gives you those delightful flaky layers.
Now, let’s chat about time-saving techniques . prepping ahead can save you panic at the last minute. you can make this dough ahead of time, chill it in the fridge, and roll it out when you’re ready.
And just a heads up, resting the dough is essential—gives gluten time to relax, preventing any dreaded dough shrinkage.
For flavor enhancement, if you’re feeling fancy, don’t hold back on some added spices or cheeses. trust me, a bit of grated cheese in the dough makes a world of difference for savory pies.
And, if you’re going sweet, toss in a tablespoon of sugar.
Perfect Presentation: Make Your Pie Shine
After you’ve nailed that recipe, it’s time to think about how it looks on the table because we eat with our eyes first! when it comes to plating techniques , remember that less can be more.
Try a simple garnish of fresh herbs for savory pies like a cottage pie recipe —it adds a pop of color and freshness.
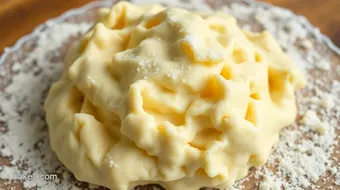
For fruit pies, a dusting of powdered sugar can be magical.
Speaking of color combos, consider the vibrant reds of strawberries with the deep greens of mint—it’s like a festival on a plate!
Storage & Make-Ahead: Keep It Fresh
So, what if you want to make your homemade pie crust ahead of time? no problem! after chilling your dough, wrap it tightly in plastic wrap, and it can hang out in the fridge for up to 3 days .
Want to keep it longer? pop it in the freezer, where it’ll be good for up to 3 months. just make sure to thaw it in the fridge overnight before using.
And when it’s time to reheat? if your pie crust is pre-baked, just throw it back in a 375° f ( 190° c) oven for a bit until it’s warm and inviting again.
Creative Variations: Mix It Up
Alright, let’s talk fun twists! For a seasonal touch, think pumpkin spice in the fall or fresh berries in summer. It'll keep your pies fresh and exciting.
You can totally switch up your fillings too. Swap a sweet pie filling for a savory option by simply filling it with roasted veggies and cheese.
If you're experimenting with diets, pastry dough alternatives are out there! You can use graham crackers for a sweet pie crust or even cauliflower for something lower in carbs.
Complete Nutrition Guide: Know What’s in Your Pie
Alright, let’s get into the nitty-gritty. It’s essential to know what you’re feeding your crew. My complete nutrition guide for this dough estimates around 190 calories per serving—not bad for the deliciousness you get!
It’s packed with healthy fats from butter, and all those carbs? Totally worth the happiness they bring. Just keep an eye on your portion sizes—8 servings can disappear fast, especially when you’ve got a dessert pie recipe out!
Expert FAQ Solutions
Got questions? i’ve been there. troubleshooting tips are your best friends. if your dough isn’t coming together, maybe you need more ice water.
Too crumbly? you might’ve over mixed it. oh! and if your crust shrinks after baking, you probably didn’t chill it enough or rolled it out too thin.
If you’re ready to tackle this quick pie dough tutorial , you’ll soon be serving warm pies like a pro. Just remember: practice makes perfect!
Wrap-Up: Get Baking!
So there you have it, pals! with these tips and tricks, you’ll master that quick flaky pastry dough for tasty pies in no time.
Remember, every pie tells a story. don’t be afraid to add your flair, and keep those delicious filling combinations coming! now, grab that rolling pin and let’s get baking! you’ve got this!
Quick Flaky Pastry Dough for Tasty Pies Card
⚖️ Ingredients:
- 2 ½ cups all-purpose flour
- 1 teaspoon salt
- 1 tablespoon granulated sugar (optional, for sweet pies)
- 1 cup unsalted butter, cold and cubed
- 6-8 tablespoons ice water
🥄 Instructions:
- Step 1: In a large mixing bowl, whisk together flour, salt, and sugar until well blended.
- Step 2: Add cold, cubed butter to the flour mixture. Use a pastry cutter or fork to blend until the mixture resembles coarse crumbs with pea-sized pieces of butter.
- Step 3: Gradually add ice water, one tablespoon at a time. Mix gently with a fork until the dough begins to come together.
- Step 4: Transfer the dough to a lightly floured surface. Gather it into a ball and gently knead just until combined, avoiding overworking it.
- Step 5: Flatten the dough into a disk, wrap it in plastic wrap, and refrigerate for at least 30 minutes for better handling.
- Step 6: On a floured surface, roll out the dough to about 1/8-inch thick, and fit it into a prepared pie dish. Trim excess dough and crimp edges as desired.
- Step 7: If using a pre-baked shell, line with parchment and fill with pie weights, then bake at 375°F (190°C) for 15 minutes. If using immediately, follow filling recipe directions.
- Step 8: Fill the pie with your desired filling and bake according to filling instructions, ensuring it is golden brown and cooked through.
Previous Recipe: How to Make Delicious Gluten-Free Pancakes Quick: 10 Fluffy Tips!
Next Recipe: How to Bake Fluffy Vanilla Chiffon Cake Quickly: My Simple Secrets